
On this Seth Thomas clock, it needed all three. The dial had been very poorly repainted, the veneer had chips, and the movement (which is the subject of this post) was not in excellent condition.
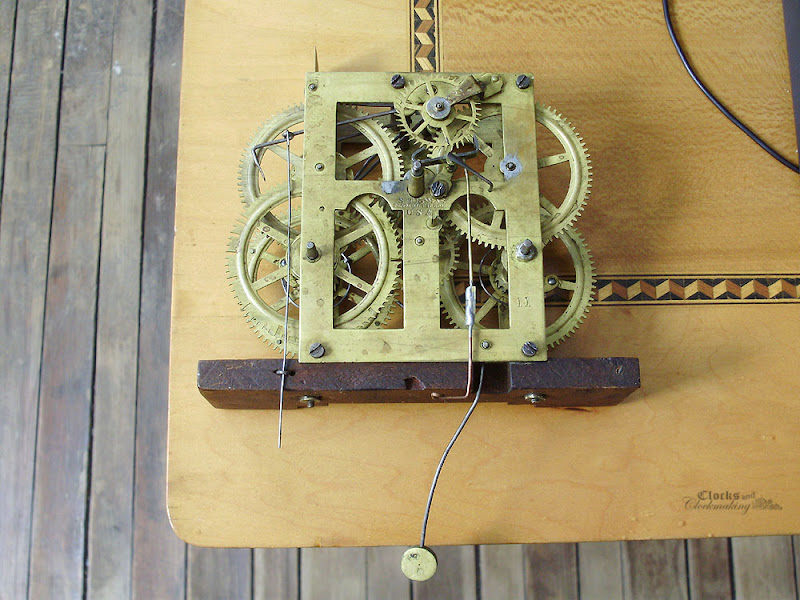
Here is the movement "as found". Overall not too bad, but in need of some attention. This is a Type 1.242 movement. Note the use of screws to fasten the top plate, and the semi-circular projection on the plates by the time second wheel pivot. I wasn't able to find manufacture dates for this specific movement, but I would guess early 1870s.

Note hole-closing punch marks (not repairable), and a few new bushings.

Lots of solder, and note the damage to the screws.

A creative (and strong) repair to the crutch wire. While this is certainly strong and durable, it is far from elegant.

Upon disassembling the movement, I discovered that the fan wheel had been soldered.


I don't know why the escape wheel bushing is so ridiculously long. With a larger surface area (metal on metal contact), the clock needs more power to drive it. This is one of the reasons why clocks with very thick plates have deeply cut "oil sinks" for the pivots. In those cases the plates are thick for strength (and looks) and the "oil sinks" are to reduce the thickness and contact area. In this case, the bushing is twice as deep as it needs to be.

Most of the work on this movement (even though it looked rather bad) was simply cleaning and solder removal. On the areas where the solder was just a very thin film, abrasives were used. I used very fine sand paper (maybe 320 grit?) followed by finer grit, and #0000 steel wool. On any heavier areas, the excess solder was heated and "brushed off" the surface before sanding and polishing.
The excessively thick bushing was filed down, and given a light peening. This closed-up the pivot hole slightly, so it was opened-up again with a cutting broach.
The following photos show the repaired (cleaned) areas before cleaning the movement and wheels in cleaning colution.


I don't have photos of the fly wheel repair, but the solder joint was a cold one, and I was able to take it apart easily.
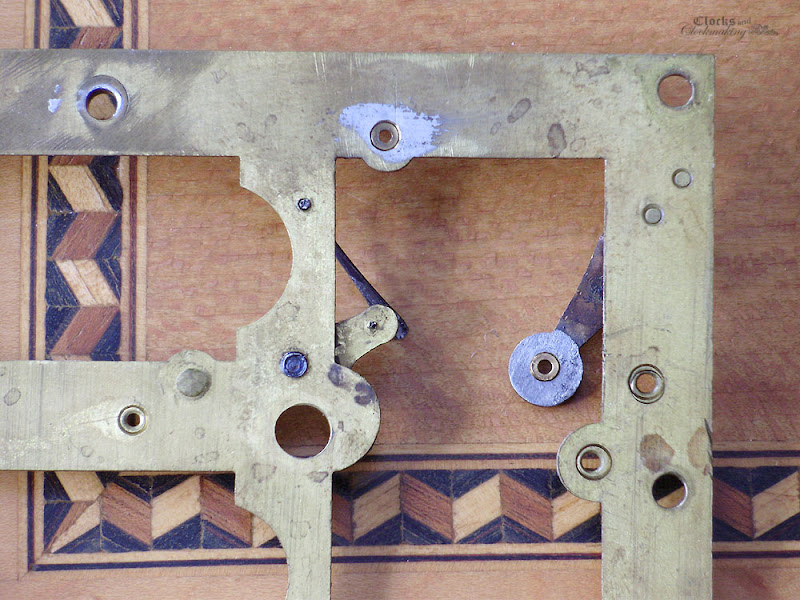
The crutch wire repair was done using a half-lap joint (splice) using a new piece of brass wire. You can spot the joint just over the spoke of the main wheel.
In addition to this, the screws were repaired (mangled sections cleaned with a file, and new bluing applied).


The movement did not come out of the cleaning solution as nice and shiny as I had hoped, so the parts and frame were given a light polish with #0000 steel wool.
very nicely done!
ReplyDeleteThanks Jim, nice to see you on the blog. I'm really not sure why the plates had solder on them in the first place. I suspect the bushings might have been slightly loose, but to make an adequate solder joint there would have required a lot of heat. The plates, however, don't really show signs of having been overheated. Movement works perfect and keeps time to within less than 30 seconds a day (having adjusted it only a few times with a new pendulum).
DeleteWow! That's a ton of work JC. Well done. Where did you gain the experience for clock repairs? Seems like you really know what you're doing. Check out a guide I helped write on repairing cuckoo clocks here: http://www.bavarianclockworks.com/blog/diy-cuckoo-clock-repair-guide/. Would love to get your thoughts on it!
ReplyDeleteThanks Melissa. I've been learning clock repair for over a decade. I'm self taught (largely from books, and with the help of clock friends and the NAWCC Message Board). This movement didn't really need anything too complicated. Solder removal, cleaning, one or two bushings repaired, and a new crutch wire.
DeleteYour guide seems well written and informative. I don't have too much interest in cuckoo clocks (they're a real pain to repair and setup properly), so I just briefly browsed through it.