Showing posts with label Antique. Show all posts

Sunday, May 28, 2017

Antique Hopf (Repro) Violin Restoration

I recently finished the restoration of my Hopf violin. I just have to get it set up and strung. I thought I would share the before and after photos. This is not clock related, but many of the techniques and materials are the same as those that I use in clock repair: hide glue, shellac, veneer tools such as small saws, small clamps, sand papers, etc.

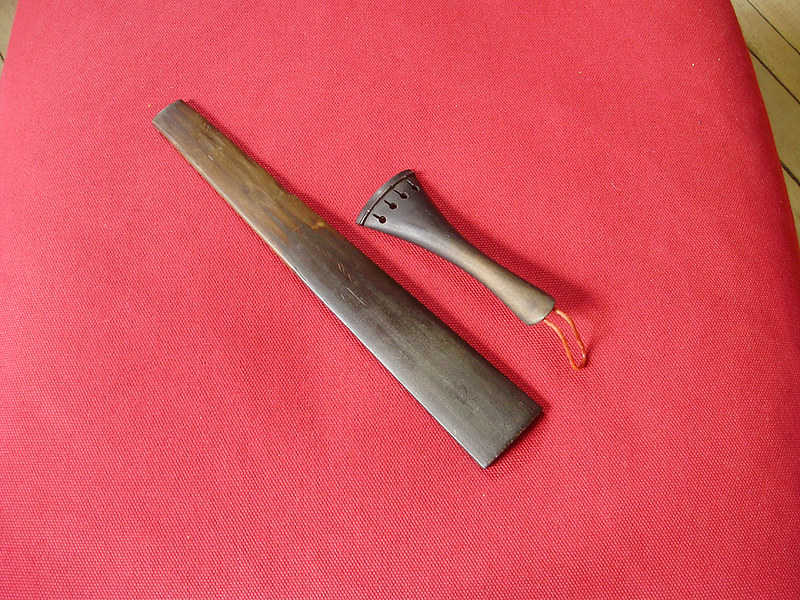
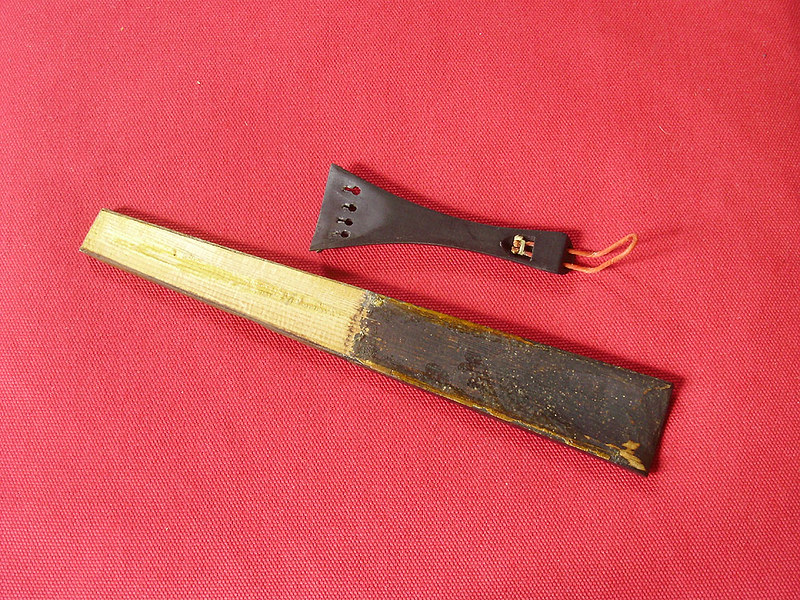
This is an antique violin marked "HOPF" on the back, but it's generally referred to as a fake Hopf violin (in the same way that you can buy a Stradivarius copy today). The real ones made by this 17th century family are marked only on the interior, and they are far more valuable. This one is somewhat poorly built (with no interior corner blocks), and there are several other small issues with it, such as a curve to the neck, and very poorly (crookedly) drilled peg holes. Another dead giveaway that this was originally a cheap German made violin is the fact that the fittings on it were made from cheap woods. I'll repeat this with the accompanying photos below, but the fingerboard was PINE (which is absolute garbage because it needs to be a hardwood at the bare minimum - ebony being the preferred choice), and the pegs (the one original one that was left) and the tailpiece were maple stained/painted black.

All that being said, it's still an OLD violin, probably from around 1900. This is the kind of violin you are likely to come across if your uncle/father/grandmother etc. happens to have an old violin lying around somewhere. Some are better than others, but generally all old violins will have a decent sound because the wood has aged, they've gathered patina, they were played frequently, and most of all: they were hand made. The variations in thickness, as well as the hand varnishing both add significantly to the quality/desirability/sound of a violin. Modern mass produced violins are cut by CNC and because they are too perfect/precise, they tend to have a certain generic sound to them that violin experts can pick up immediately. My ears aren't that well trained. Once this one is playable, it should have a fairly mellow sound.

Anyhow, I picked up this poor little thing all battered and abused from a local thrift shop for 25$ CAD + taxes. I'd say that's a pretty darn good price. It came with a pretty beat-up/ruined bow, which I might also try to repair.
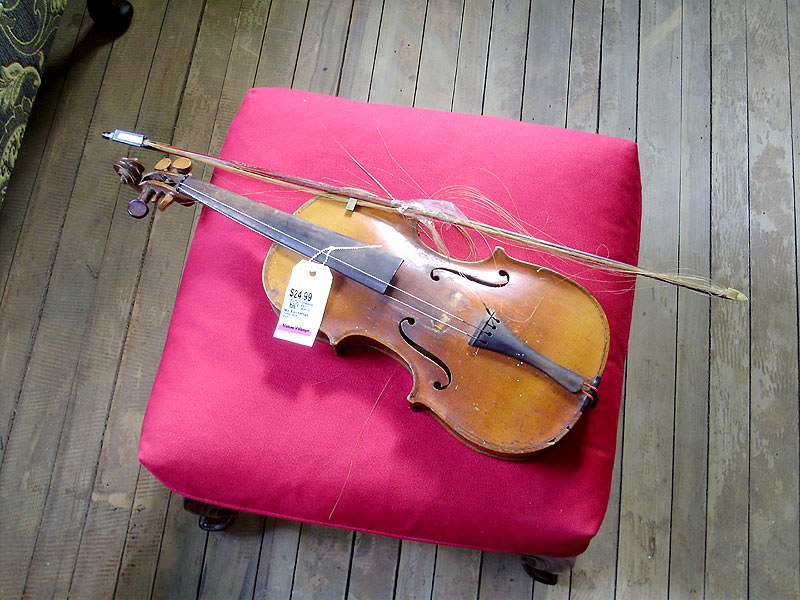
P9120199

One-piece flame maple back with a two-tone colour.
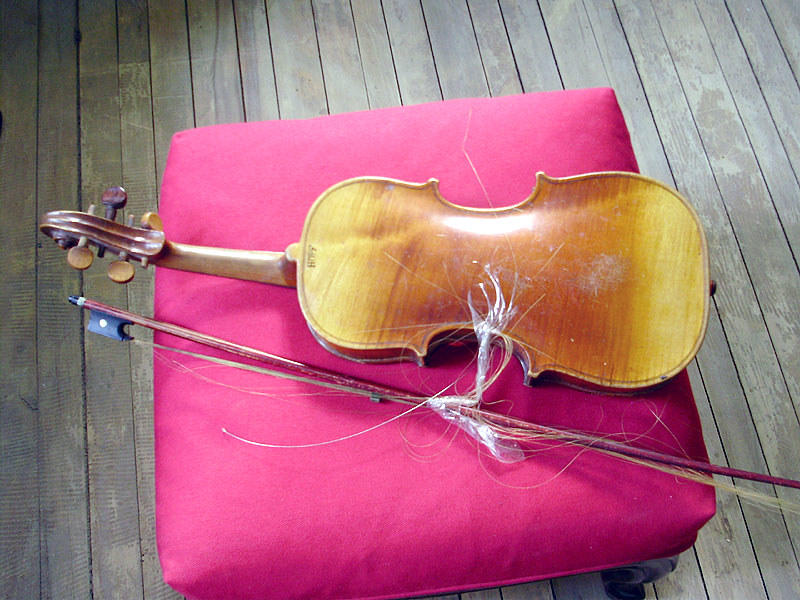
P9120202

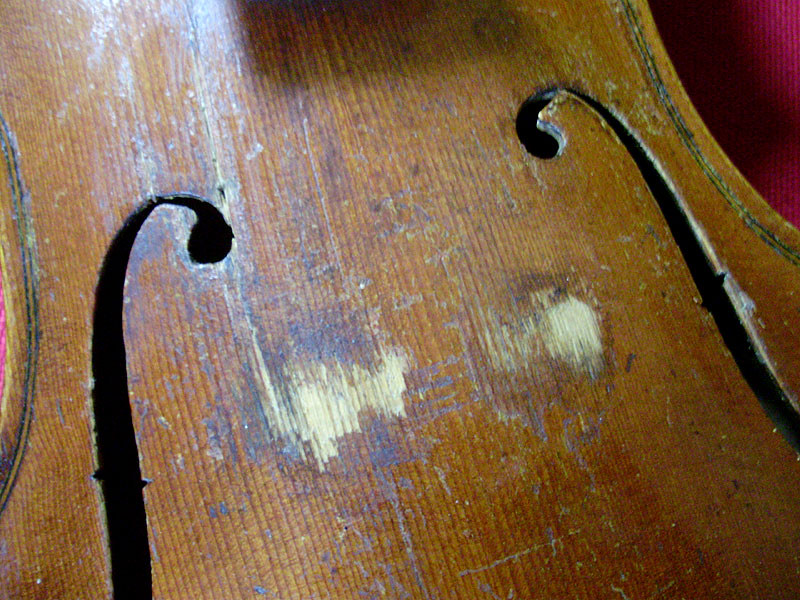
The top was badly gummed-up and dirty. The area where the bridge sat was also very badly scratched down to bare wood.
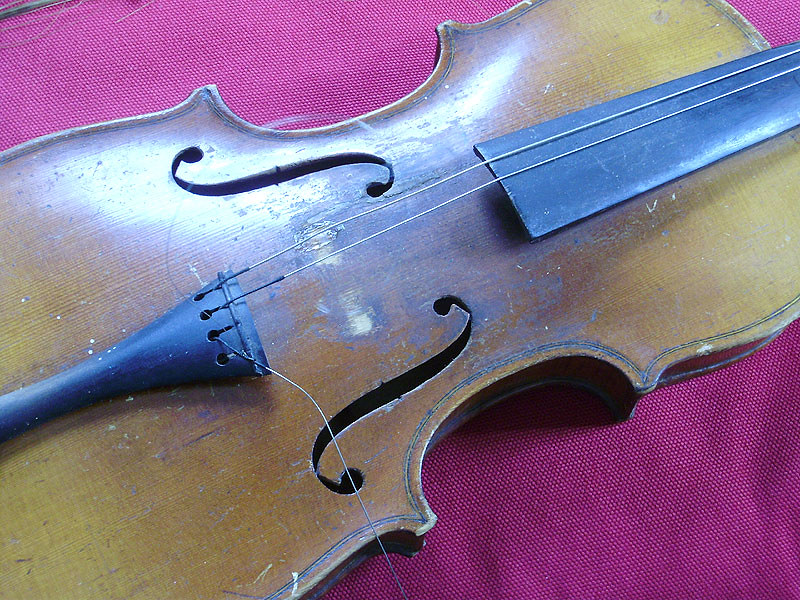
P9120211

The tailpiece had also scratched up the top.
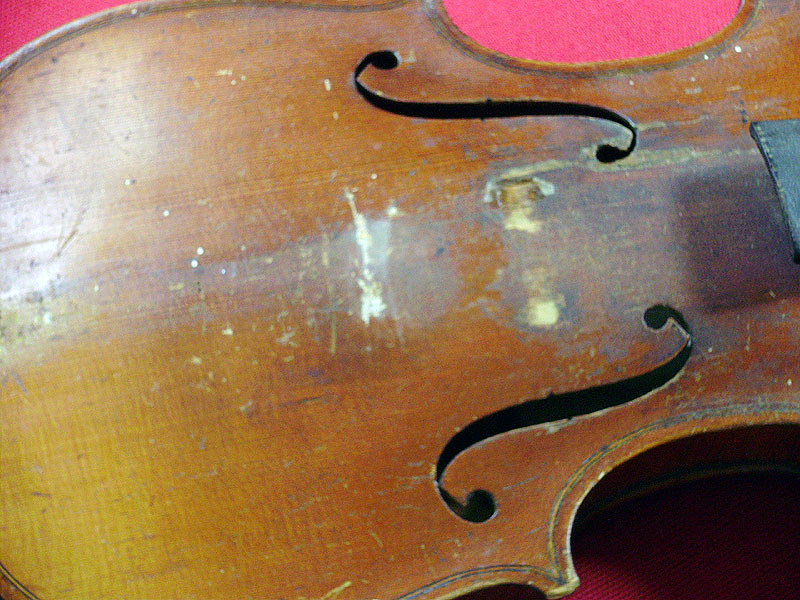
P9120217

P9130237

The SEVERELY worn down pine fingerboard. Obviously this instrument was played a LOT.
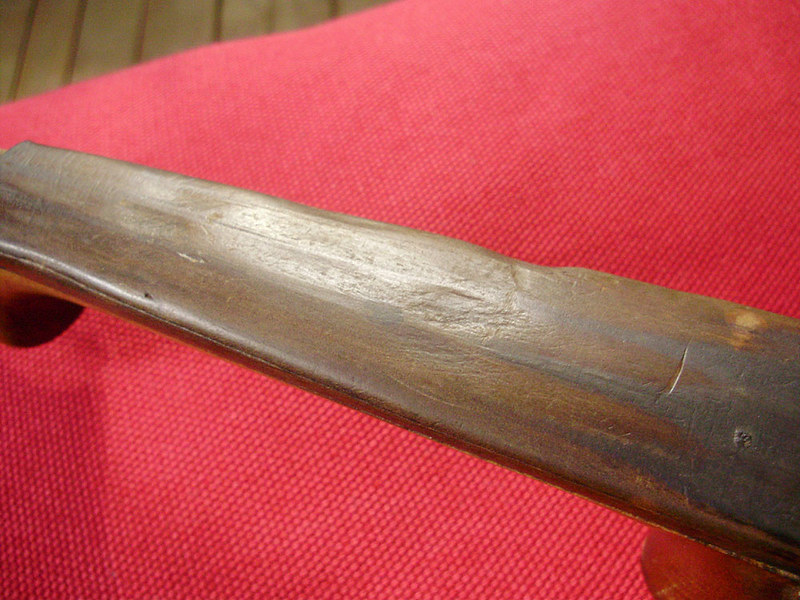
P9130245

This was after I repaired/blended and touched-up the top. There were also wear marks along the edges of the top. It's not perfect, and there are a few blotchy areas, but I wanted to preserve as much of the character/patina as possible.
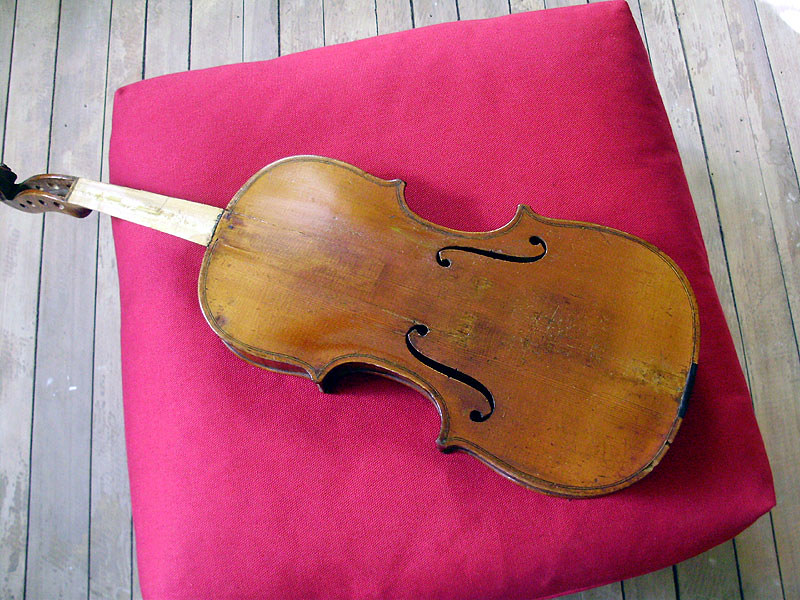
P9130249

I did not do very much with the back. Mostly just a cleaning and wax polish.
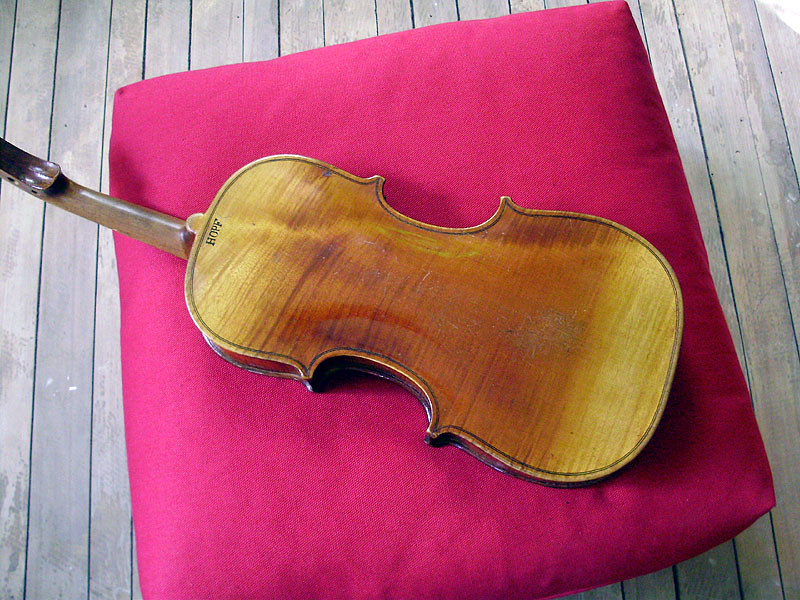
P9130250

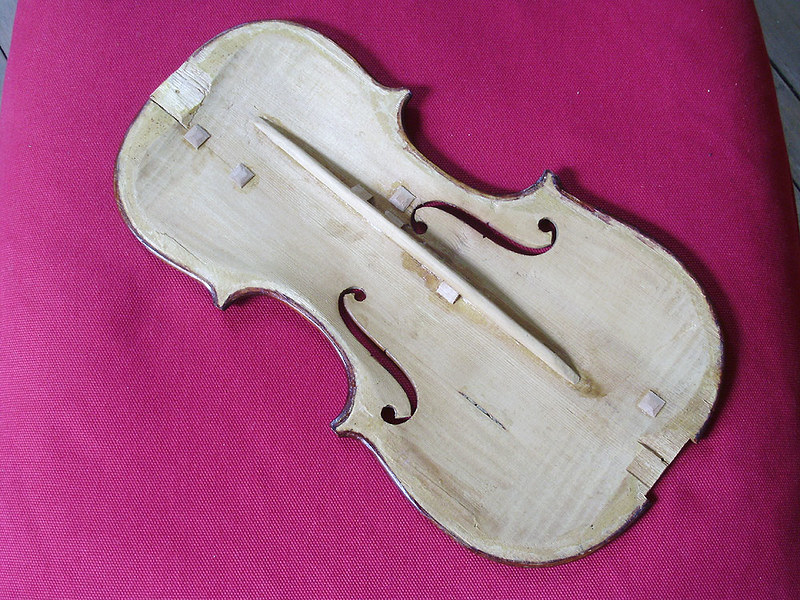
The top had at least two very bad cracks in it (which eventually ended up being 4 cracks), so I had to separate it to repair it. You can see how there are no corner blocks in the pointed corners.
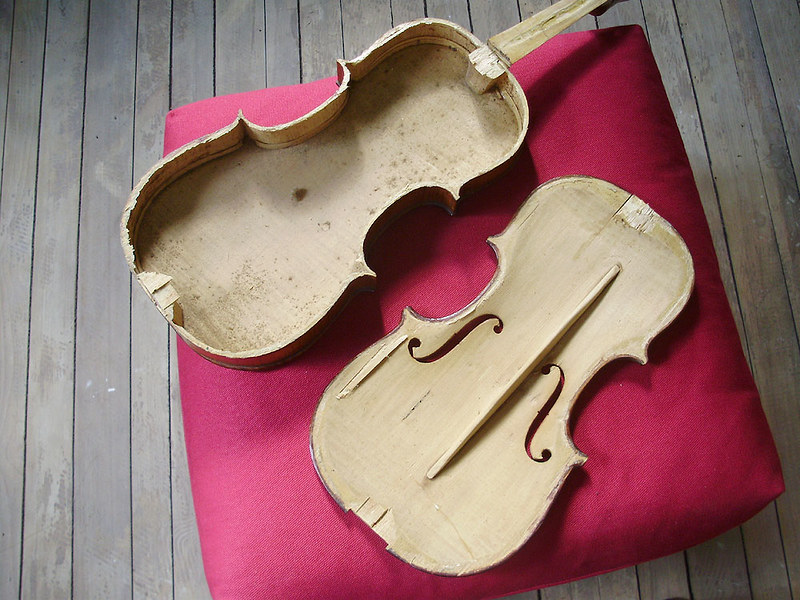
P9140254

I discovered a very alarming problem with the violin's top, and I was very glad that I decided to remove the top. The entire bass bar was split and coming loose from the top. There was also a crack along the edge (where the bridge sits).
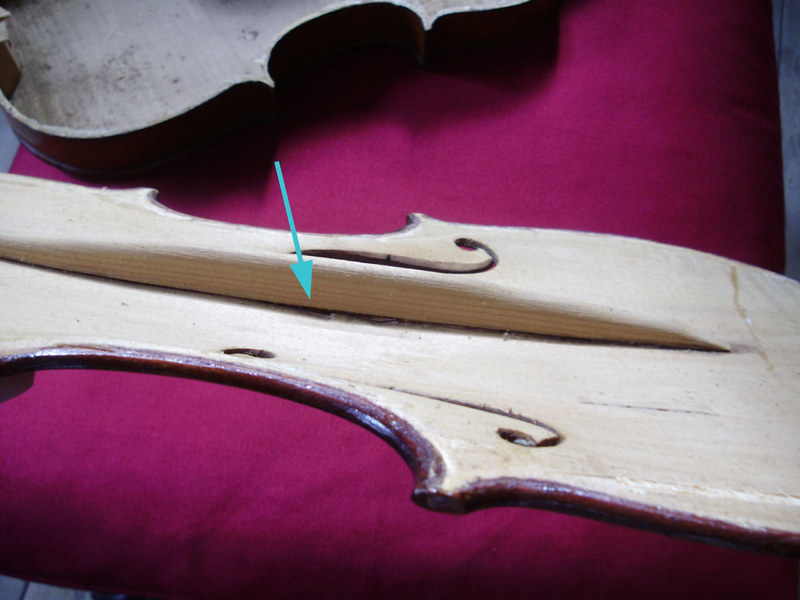
P9140257

Interior view. No names, inscriptions, or repair dates. Just dust.
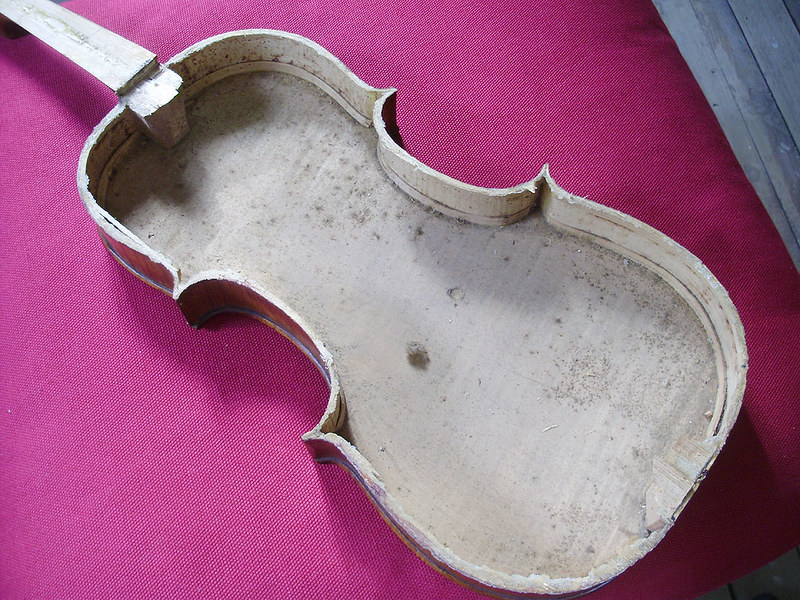
P9140258

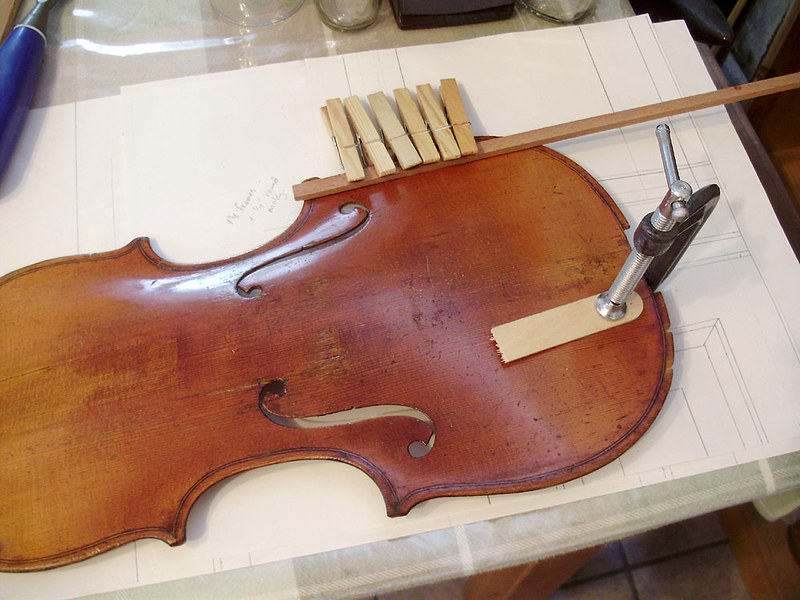
Some of the top repairs were easier to glue than others.
P9140275

I did look at several violin repair tutorials and fixed it in the normal acceptable current method, which is to install small patch blocks (cross grain glued) made from cedar, and then pared down thin. I also had to slightly sand and re-shape the glue-side of the bass bar for a tighter fit.
P9160278

Here were the cheap fittings. Painted pine fingerboard, and maple tailpiece stained to look like ebony.

A quick note: when it comes to violins, there doesn't seem to be any real impact what fittings you put on it. Generally it needs an ebony fingerboard, nut, and saddle, but the other fittings are to your choice. The pegs, tailpiece, and chin rest can be any wood you like (Rosewood, Boxwood, and other exotic woods are popular). Some can be carved, or have fancy inlays of shells, ivory or metals. Changing the fittings doesn't seem to affect the value of a violin. For this one, I went through a lot of trouble to track down plain ebony fittings (no inlay or anything, just very plain black ebony).
P9160283

P9160284

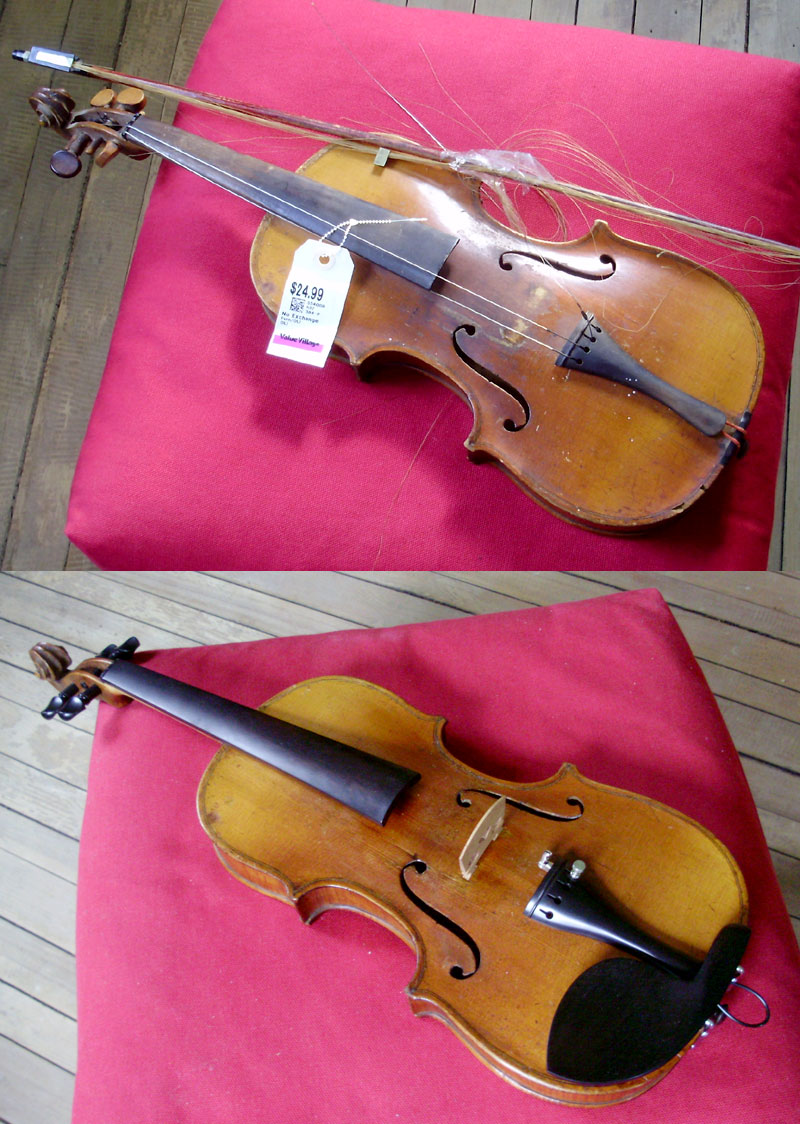
Before and after:

P9120199b

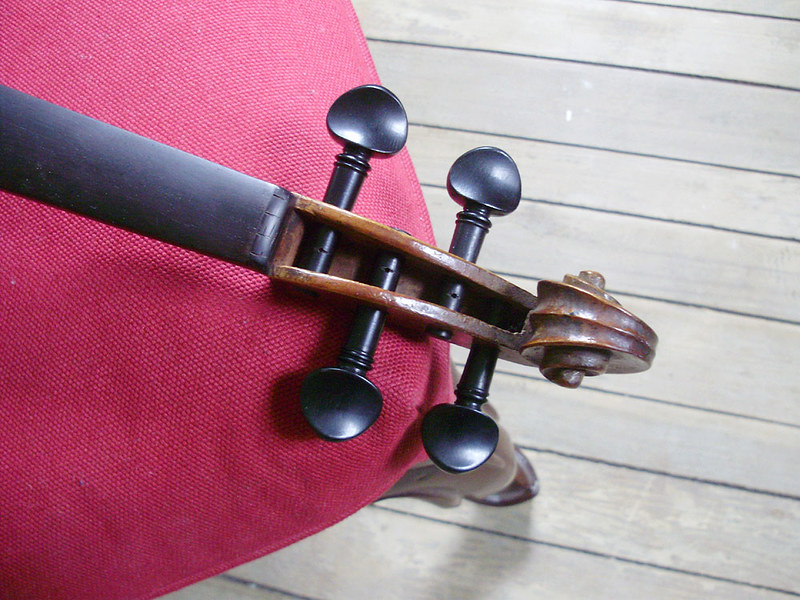
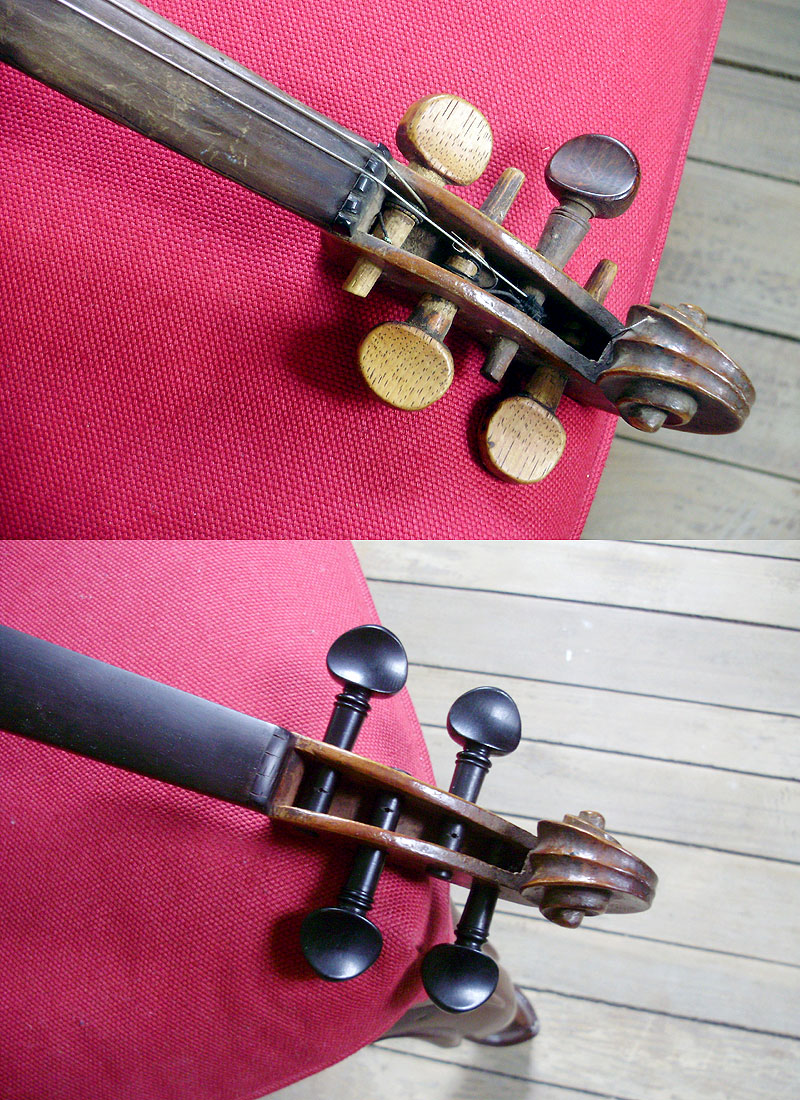
The old pegs were a complete mess. Someone had hand carved some very crude oak pegs for this and they did not work or look good. When I fit the new pegs, I had to enlarge the worn out holes slightly, so I tried to straighten the pegs as much as possible. Most are good, but the bottom one is still quite crooked. Also note the nut (before and after). Yikes!
P9120215

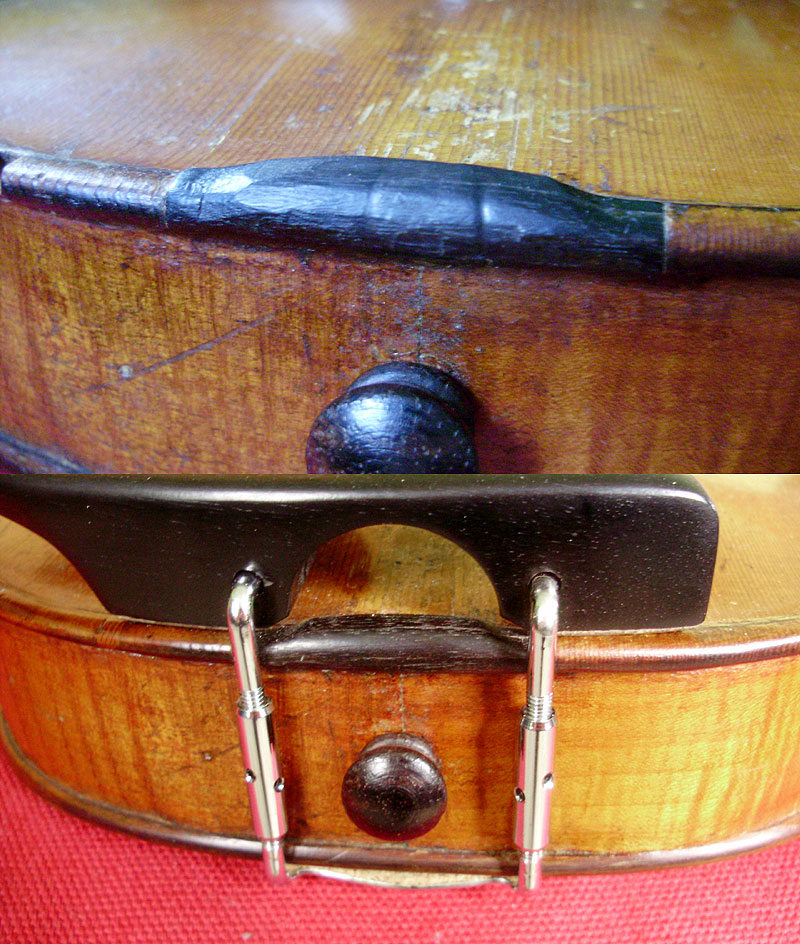
The saddle that was there was probably a replacement, but it was very badly carved. It didn't need to be replaced, but I did clean it up and sand it significantly. I had a new end button in my new parts, but I chose to keep the old one (this is the only part of the old fittings I kept because it was actually ebony).
P9130236

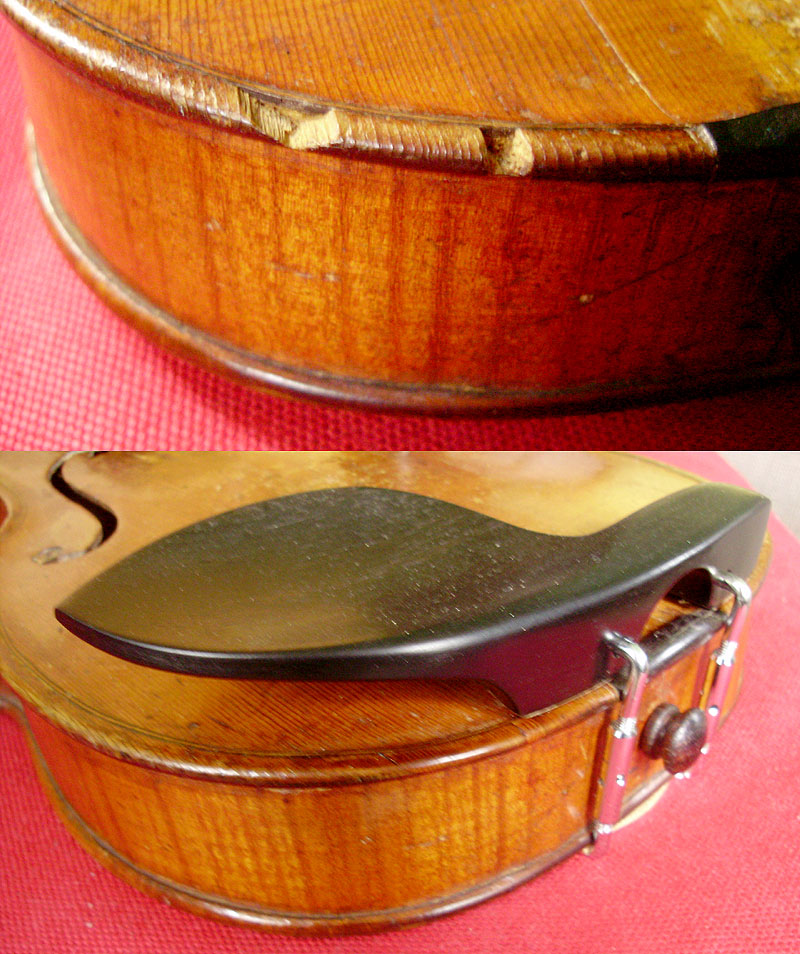
The top had two small chunks broken from the edge that I was able to patch. One is nearly invisible, but the other one shows a little bit.
P9130238

A close up of just the pegbox:

P4240017

P4240014

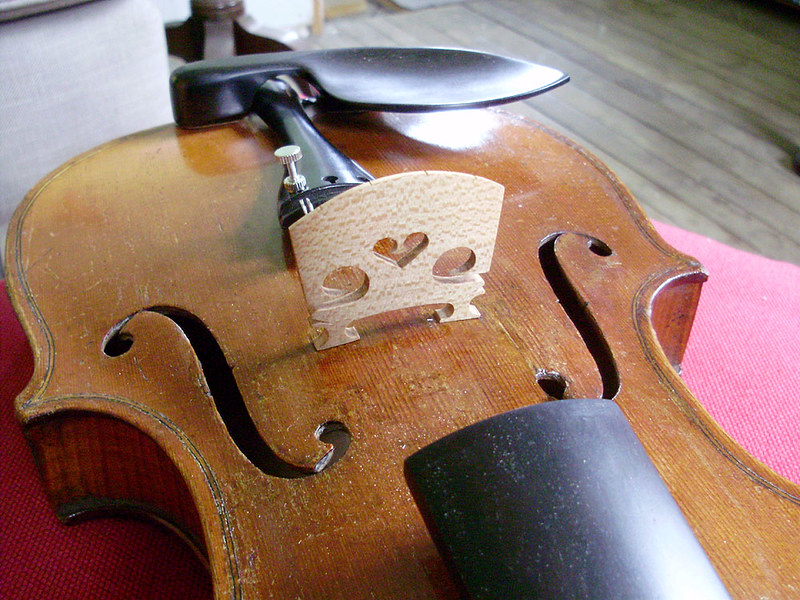
Hand carved and antiqued bridge

P4240016

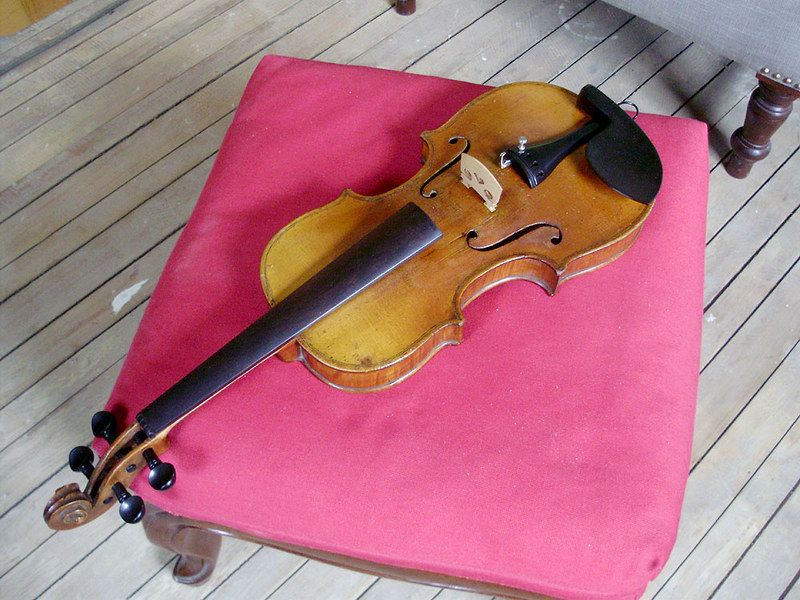
That's it. I may post a photo of it again once it's strung.

Sunday, January 3, 2016

Heirloom Violin Restoration

This is not strictly clock related, but the restoration deals with all the same issues.


As you can see, the violin went through quite the transformation. Here's another look at some of the "before" photos:


This violin is a friend's family heirloom. Apparently there were a few people in the family who wanted it, but it went to my friend. I don't remember if it was his grandfather's or his great-grandfather's, but in either case, it was in very bad shape, and he wanted to have it repaired so that my other friend (his wife) can play it.

Just from looking at the violin, it's very apparent that it was well loved, and saw a LOT of use. There are actual divots in the ebony fingerboard from playing the instrument. At some point, the nut (the small piece of wood at the top of the fingerboard) was lost, and the strings were simply held in place (poorly) directly on the end of the fingerboard (causing about 7-8 different marks in the wood). At some point the bottom saddle (the black strip along the bottom which spreads out the force from the tailpiece's gut line) was lost, and the instrument was played anyways (which caused two deep wear marks into the cedar top from the stress of the tailpiece gut). The current saddle is ebony, and obviously hand carved by an amateur. This adds charm, so I simply reglued it (it had come loose).

The existing bridge also looks like a later replacement, and the top of it (along with the 4 string grooves) are very poorly cut. The angle of the top of the bridge is also wrong (it should have a bit of a slope). It also doesn't make good contact with the top of the violin (it would need tweaking). The tailpiece also happens to be broken (the upper right corner hole is torn out) and I suspect the tailpiece isn't original either. Two of the pegs might be original, but one is a later replacement, and the fourth one is missing. We may opt to get a whole new set.


The entire neck was split (weakened glue joints) on the top and bottom, and there were one or two other places along the top that were separated.


Lots of scratches and abrasions on the back.


I didn't know exactly how far my friend wanted me to go with this violin, but I had told him I'd do my best, while also trying to do as little as possible to change the antique qualities/patina/look of the violin.

The top, however, was pretty far gone. My friend said that he doesn't think it ever had a chin rest, and I believe him. If you look at the second photo above, the chin rest portion of the violin top is down to bare wood, and it has darkened from oils/grime. What was left of the finish on the top was just a few sections near the edges.

To clean the old finish on the top, all I did was lightly rub the surface with a clean cloth dipped in alcohol. The fingerboard was removed before cleaning the top (it was already loose). The original finish was shellac, and the alcohol melted and redistributed the shellac. A lot of the shellac that was there, however, had turned black from oils, and grime, so about 80% of it was removed. While rubbing off the shellac, I was also trying to blend the finish, and keep the darkened edges intact. I could have taken it down almost to bare wood, but then the surface would not have matched the sides or the back, and I did not want to strip the original finish and patina off the rest of the violin. The sides and back were relatively okay.

The rest of the violin was cleaned with a damp cloth and thoroughly washed. You can see from the photos of the scroll that a lot of what was there was just dirt.

All the loose joints were glued with hot hide glue, and clamped with instrument maker's clamps (or shop-made equivalents). Once the violin was clean, I went over it to remove any excess blobs of glue, or other imperfections. I did some small touch-ups, and then I applied 1 or 2 thin coats of fresh shellac over the violin, avoiding the neck area, and applying additional shellac to the mostly-bare front. This thin new coat helps to conceal the scratches, as well as bring back a lot of the shine to the instrument (especially along the sides, and in the details of the scroll). The shellac (once dried overnight) was then hand polished with ultra fine steel wool and wax, and buffed with a cotton cloth.

The final little bits to repair were to reattach the fingerboard, and to fabricate and glue a new nut. The violin is now done, and all it needs is to replace the missing bits, and to set it up. Luckily the violin still has the original sound post, since these can be hard to fit precisely (without being able to remove the top). I don't know how to set up the sound post precisely, but hopefully we can find someone in town who can do this for us (as I have my own violin project that will need the same treatment). Luckily we do have a fairly good music shop.


I am very happy with the final results. The violin still looks old, still has a lot of its original character, and almost all of its surface patina. The surfaces are far from perfect, but with a fresh finish, it is now safe for handling and playing.


It's hard to believe that this beautiful reddish dye was hiding under all that dirt and grime.


I don't know exactly how old this violin is, if it sounds good, or if it's at all valuable. It doesn't have any label or markings of any kind on the interior. There are at least one or two small breaks (near the left F hole) and along one side which may or may not minimally affect the sound, but I'm very excited to hear it once it's ready. I'll see if I can find any more info on it for anyone who might be interested. In any case, all the restorations I did to the violin are completely reversible (hide glue/shellac).

Friday, July 10, 2015

Mirror Clock Project Part 9 - The Finished Clock

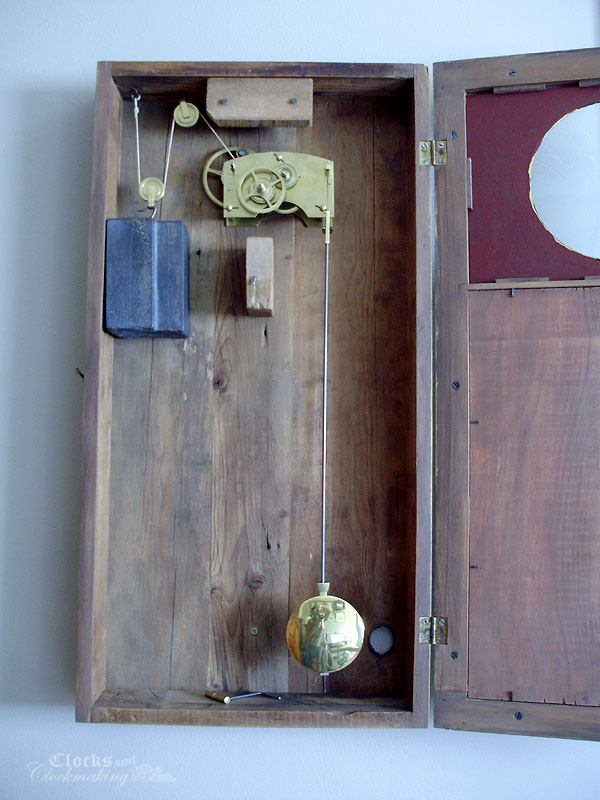
With the antique mirror finally installed, and all the final touch ups completed, the clock is now fixed to the wall properly (no more wooden block hanging on the wall), and it's ready to be used and enjoyed. A lot of work went into this reproduction, and I had a lot of fun working on it. It came out beautifully, and pretty soon I'll be working on another clock to house my custom made Lenderman movement.

I plan to make a short video of the mirror clock soon, and I will post it here once it's ready.


Mirror Clock Project Part 8 - The Mirror

Nothing beats the real thing, and rather than try to recreate an antique mirror, I was able to find one through an antiques restorer friend. The mirror he gave me had a fairly severe scratch across it on one side, but the size I needed would avoid this scratch completely. One other problem with the mirror was that it had several blobs of hot glue on the back.


Removing the glue was a trial and error method, and the first two methods failed. The first scratched the silvering, while the second pulled all of it off:


I eventually was able to remove all the glue using a mix of heat and a mild scrubbing in lacquer thinner. Once the glue was gone, I was able to cut the mirror to size and fit it onto the door. I used 12 small wood strips with a tiny nail in each.


The "inside back" wood panel was attached with small square nails. Some of these panels are fixed with the beveled edge facing out, while others have it facing in. This side of the wood was nicer, and my bevels were rather rough, so I chose to have the bevels inside. The clearances on this were tight, and this is probably why most of these doors are 3/4" thick rather than 5/8".


A few other small details that I did not show are the two rear bolts that hold the movement in place. Most are held in place with a single centre bolt, and a few small square nails on the interior to keep the movement from shifting, but I wanted a very secure fit since the weight is so heavy.


I don't remember if I had shown the pivot hole divots in the backboard, but I also adjusted the colour of the wooden dial blocks.


Aside from making a custom label, the clock is now finished and running nicely. Final photos will be shown in the next post.