Showing posts with label Shellac. Show all posts

Sunday, May 28, 2017

Antique Hopf (Repro) Violin Restoration

I recently finished the restoration of my Hopf violin. I just have to get it set up and strung. I thought I would share the before and after photos. This is not clock related, but many of the techniques and materials are the same as those that I use in clock repair: hide glue, shellac, veneer tools such as small saws, small clamps, sand papers, etc.

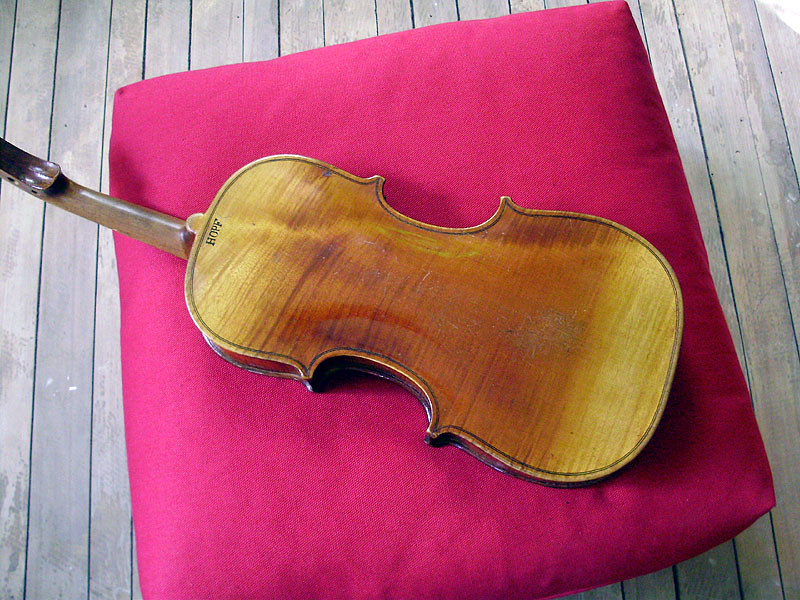
This is an antique violin marked "HOPF" on the back, but it's generally referred to as a fake Hopf violin (in the same way that you can buy a Stradivarius copy today). The real ones made by this 17th century family are marked only on the interior, and they are far more valuable. This one is somewhat poorly built (with no interior corner blocks), and there are several other small issues with it, such as a curve to the neck, and very poorly (crookedly) drilled peg holes. Another dead giveaway that this was originally a cheap German made violin is the fact that the fittings on it were made from cheap woods. I'll repeat this with the accompanying photos below, but the fingerboard was PINE (which is absolute garbage because it needs to be a hardwood at the bare minimum - ebony being the preferred choice), and the pegs (the one original one that was left) and the tailpiece were maple stained/painted black.

All that being said, it's still an OLD violin, probably from around 1900. This is the kind of violin you are likely to come across if your uncle/father/grandmother etc. happens to have an old violin lying around somewhere. Some are better than others, but generally all old violins will have a decent sound because the wood has aged, they've gathered patina, they were played frequently, and most of all: they were hand made. The variations in thickness, as well as the hand varnishing both add significantly to the quality/desirability/sound of a violin. Modern mass produced violins are cut by CNC and because they are too perfect/precise, they tend to have a certain generic sound to them that violin experts can pick up immediately. My ears aren't that well trained. Once this one is playable, it should have a fairly mellow sound.

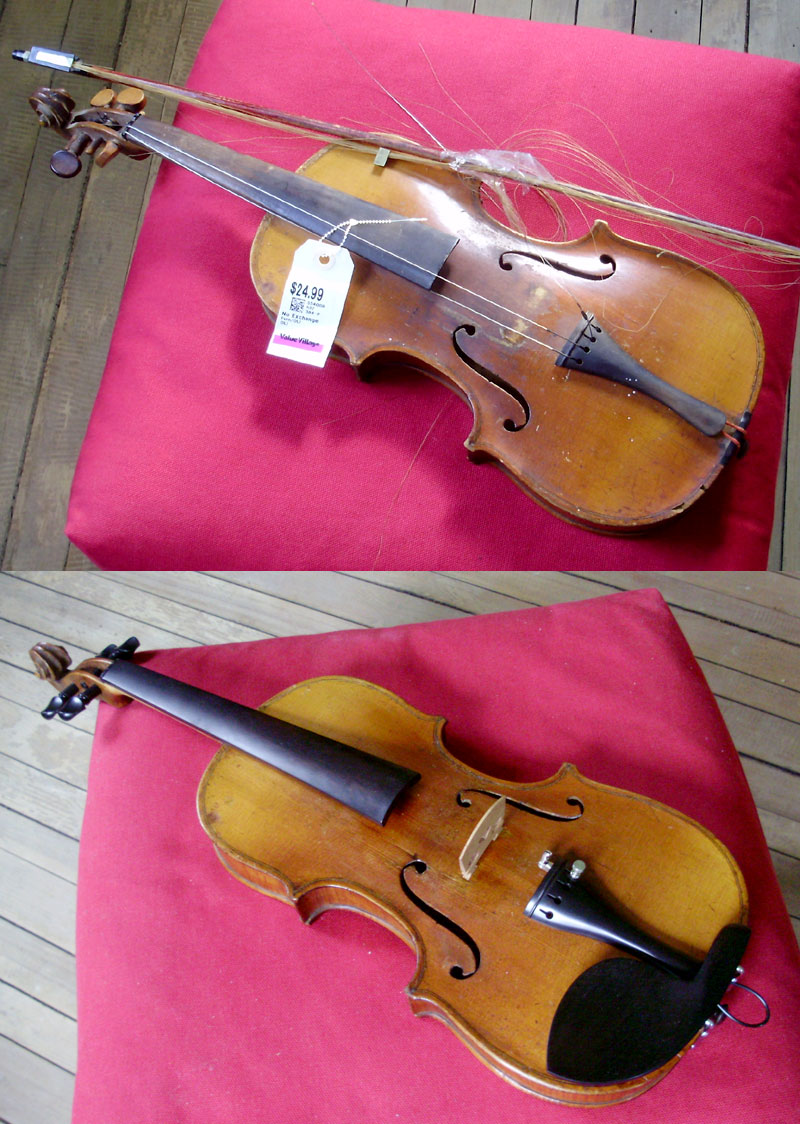
Anyhow, I picked up this poor little thing all battered and abused from a local thrift shop for 25$ CAD + taxes. I'd say that's a pretty darn good price. It came with a pretty beat-up/ruined bow, which I might also try to repair.
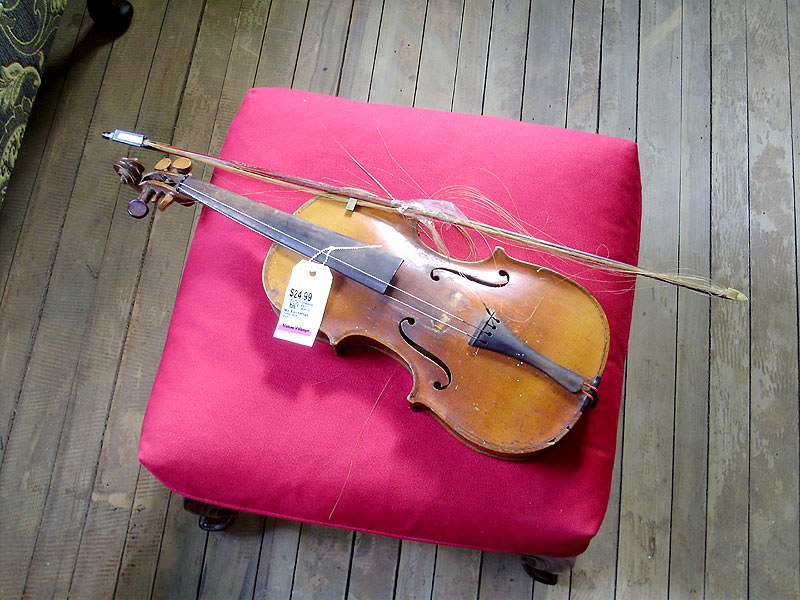
P9120199

One-piece flame maple back with a two-tone colour.
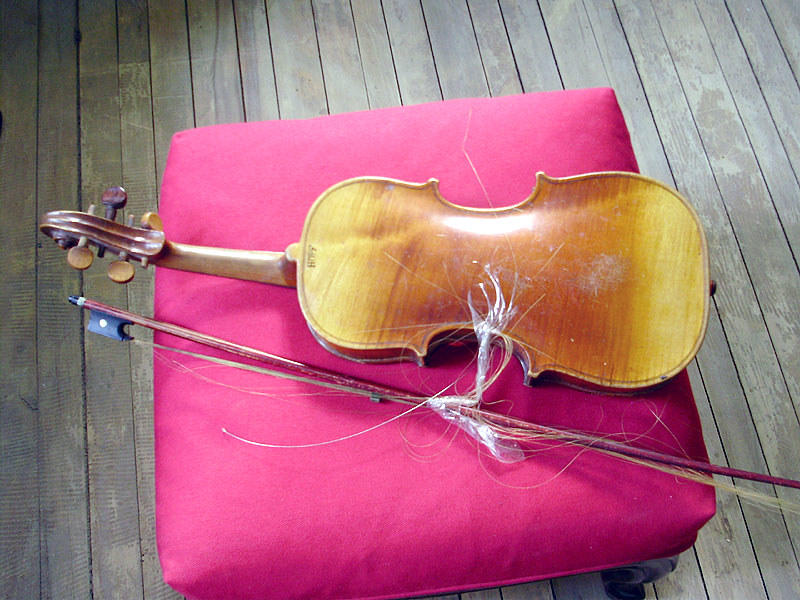
P9120202

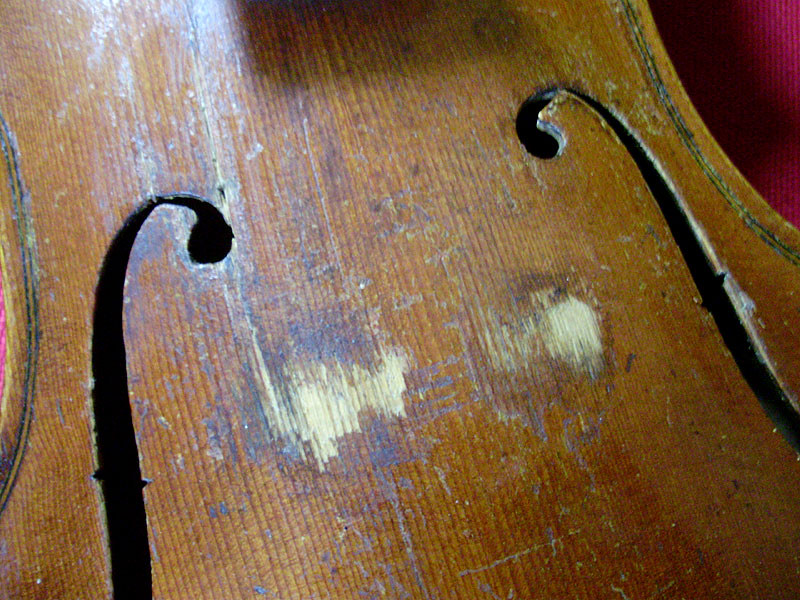
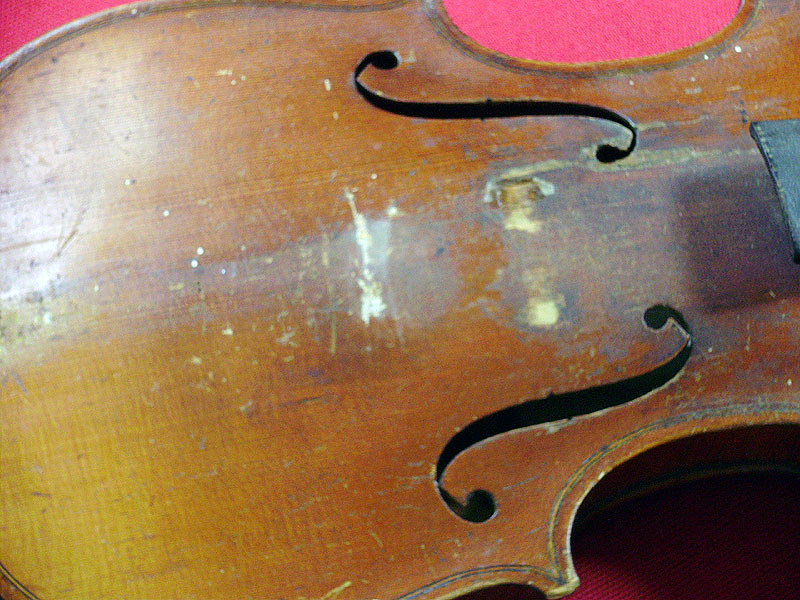
The top was badly gummed-up and dirty. The area where the bridge sat was also very badly scratched down to bare wood.
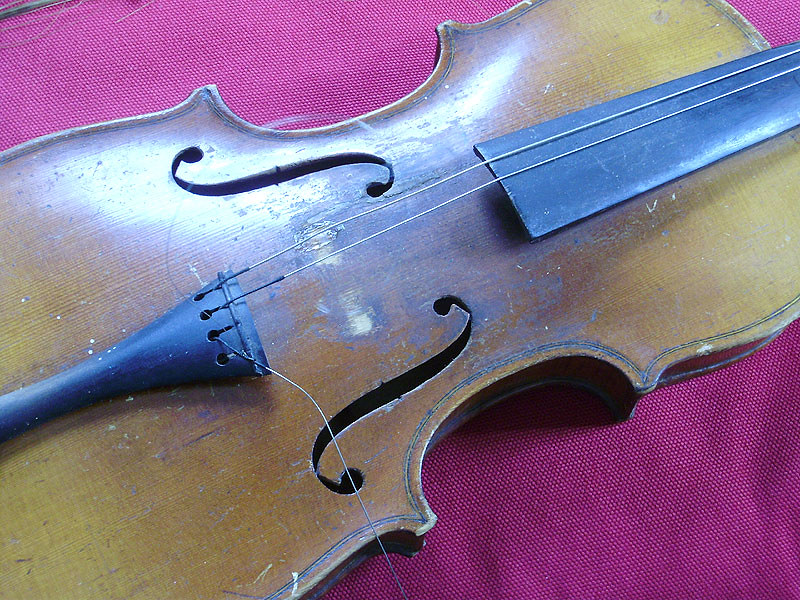
P9120211

The tailpiece had also scratched up the top.
P9120217

P9130237

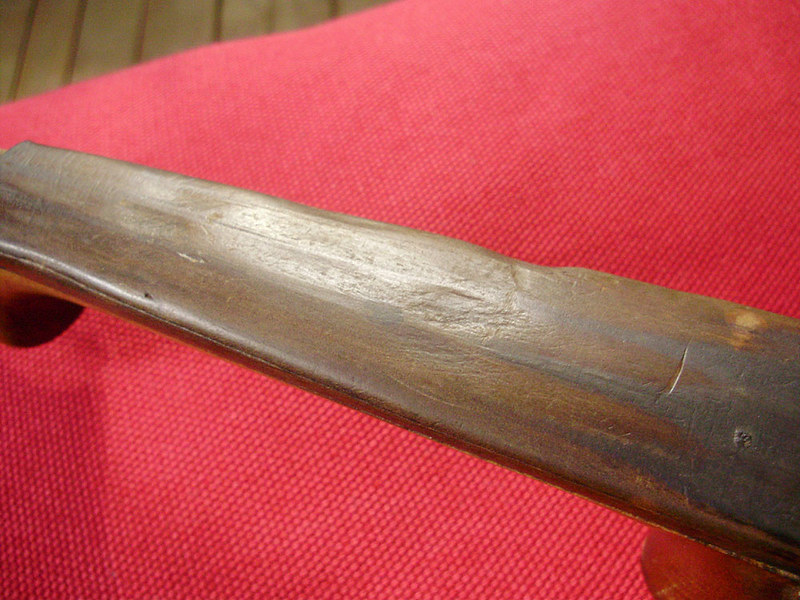
The SEVERELY worn down pine fingerboard. Obviously this instrument was played a LOT.
P9130245

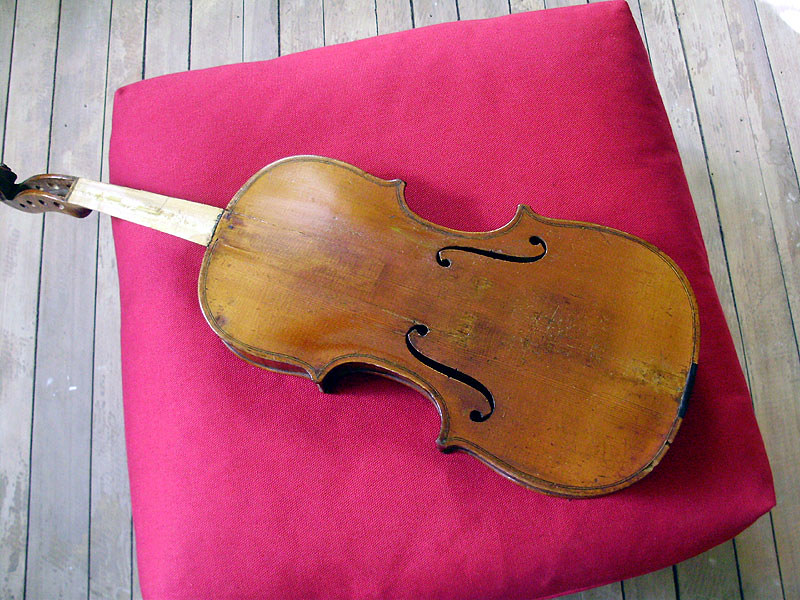
This was after I repaired/blended and touched-up the top. There were also wear marks along the edges of the top. It's not perfect, and there are a few blotchy areas, but I wanted to preserve as much of the character/patina as possible.
P9130249

I did not do very much with the back. Mostly just a cleaning and wax polish.
P9130250

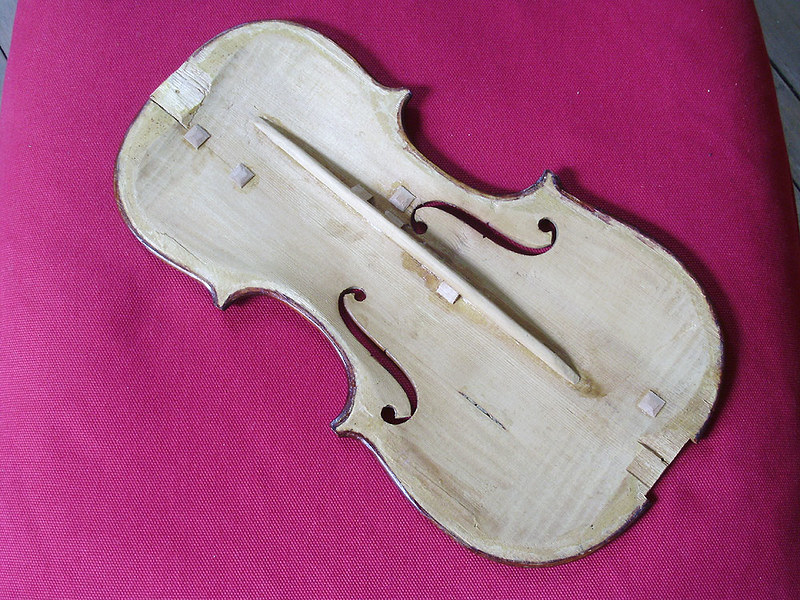
The top had at least two very bad cracks in it (which eventually ended up being 4 cracks), so I had to separate it to repair it. You can see how there are no corner blocks in the pointed corners.
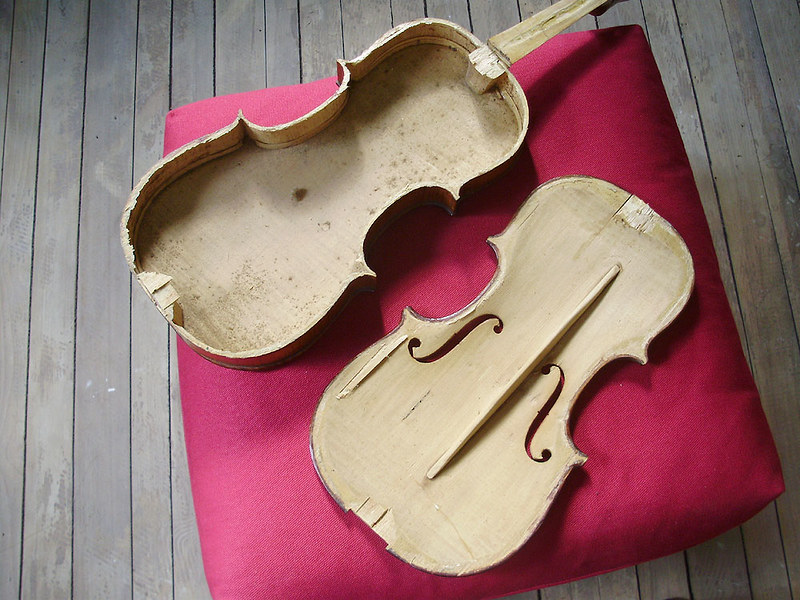
P9140254

I discovered a very alarming problem with the violin's top, and I was very glad that I decided to remove the top. The entire bass bar was split and coming loose from the top. There was also a crack along the edge (where the bridge sits).
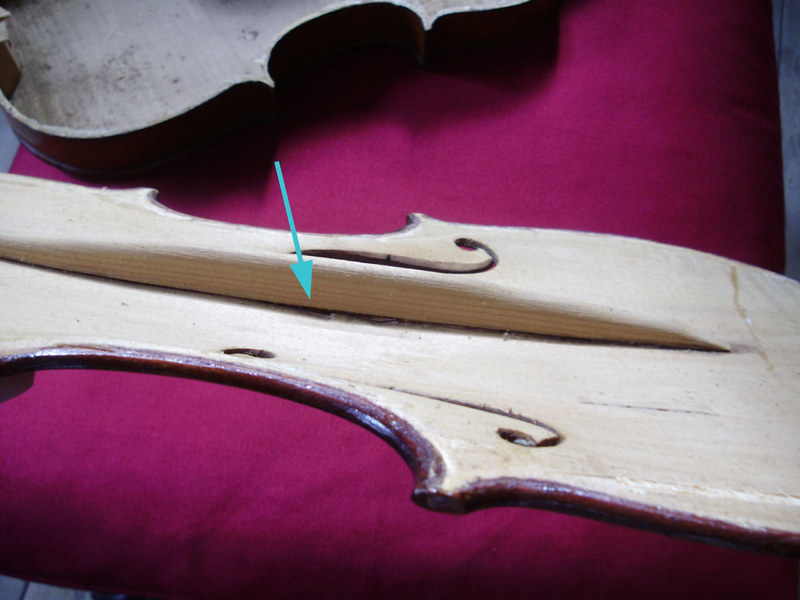
P9140257

Interior view. No names, inscriptions, or repair dates. Just dust.
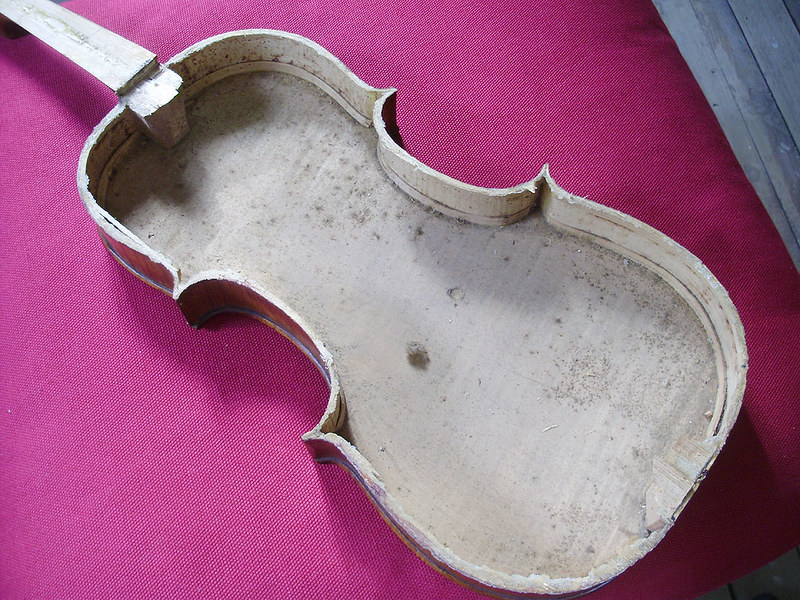
P9140258

Some of the top repairs were easier to glue than others.
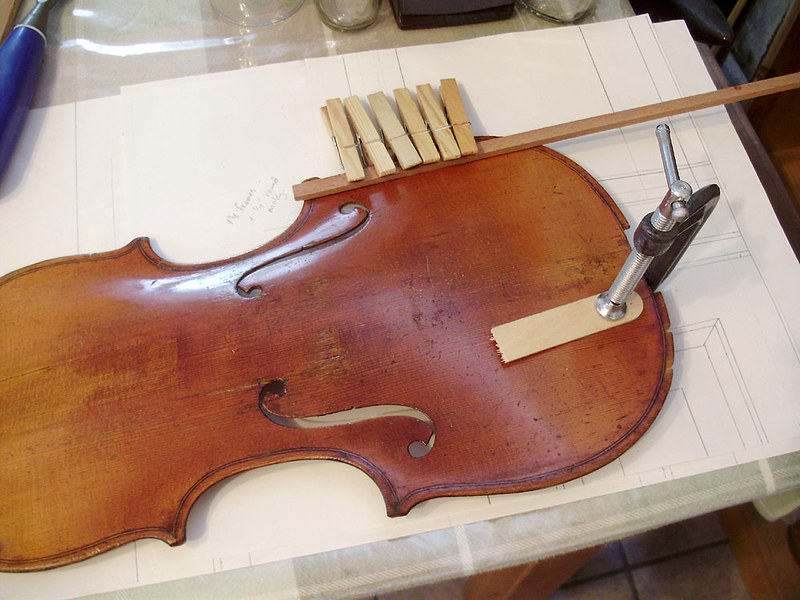
P9140275

I did look at several violin repair tutorials and fixed it in the normal acceptable current method, which is to install small patch blocks (cross grain glued) made from cedar, and then pared down thin. I also had to slightly sand and re-shape the glue-side of the bass bar for a tighter fit.
P9160278

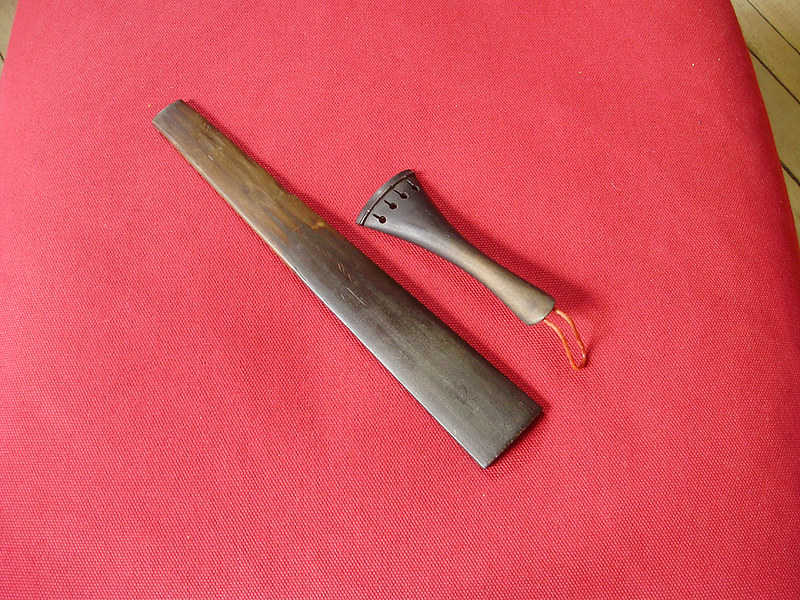
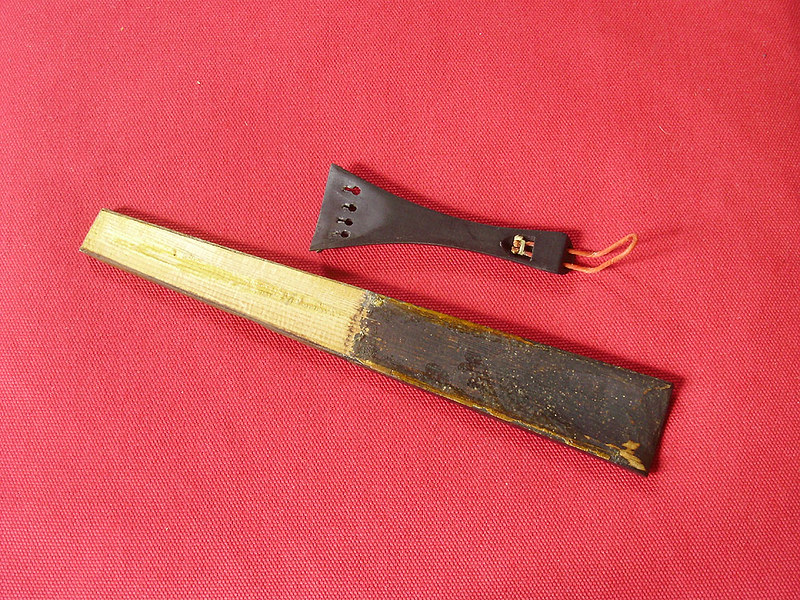
Here were the cheap fittings. Painted pine fingerboard, and maple tailpiece stained to look like ebony.

A quick note: when it comes to violins, there doesn't seem to be any real impact what fittings you put on it. Generally it needs an ebony fingerboard, nut, and saddle, but the other fittings are to your choice. The pegs, tailpiece, and chin rest can be any wood you like (Rosewood, Boxwood, and other exotic woods are popular). Some can be carved, or have fancy inlays of shells, ivory or metals. Changing the fittings doesn't seem to affect the value of a violin. For this one, I went through a lot of trouble to track down plain ebony fittings (no inlay or anything, just very plain black ebony).
P9160283

P9160284

Before and after:

P9120199b

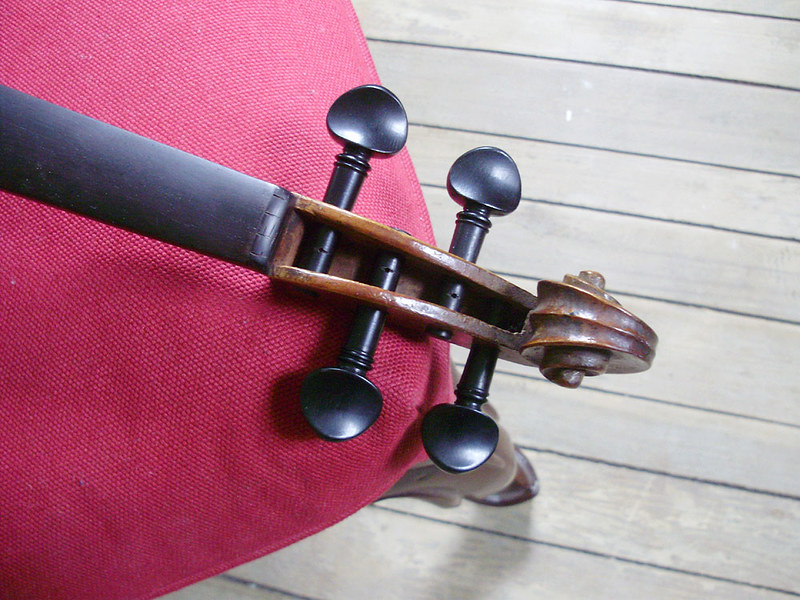
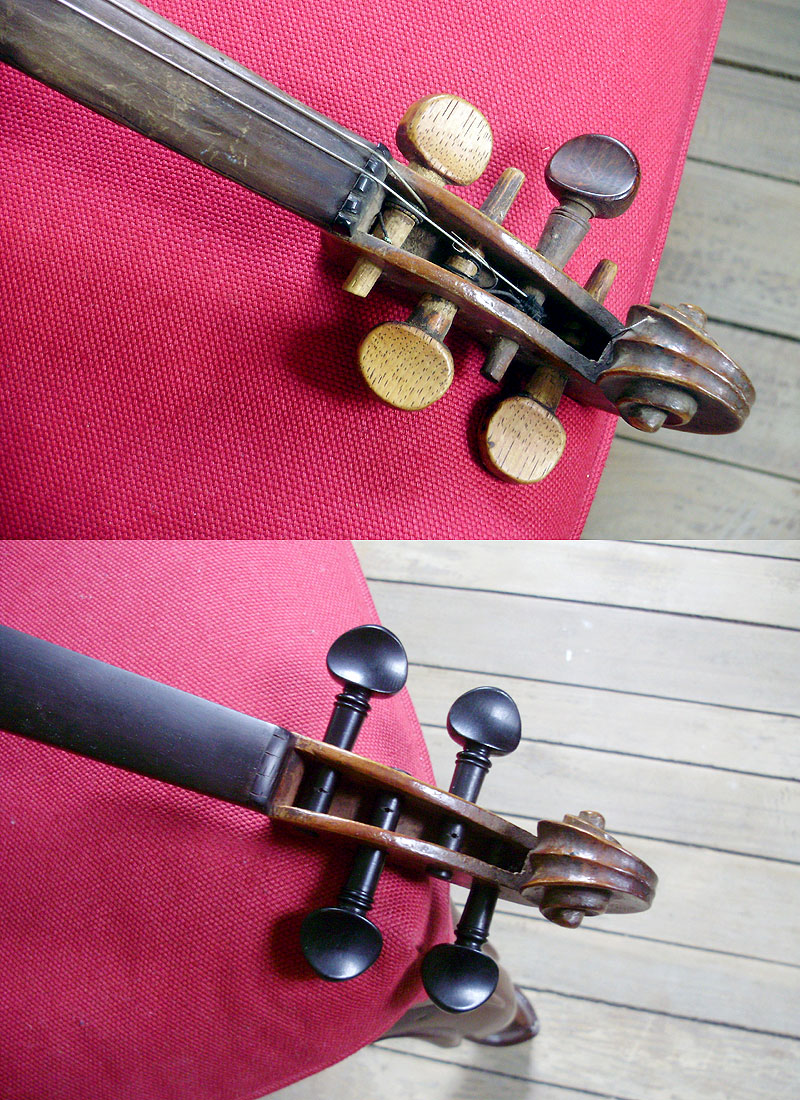
The old pegs were a complete mess. Someone had hand carved some very crude oak pegs for this and they did not work or look good. When I fit the new pegs, I had to enlarge the worn out holes slightly, so I tried to straighten the pegs as much as possible. Most are good, but the bottom one is still quite crooked. Also note the nut (before and after). Yikes!
P9120215

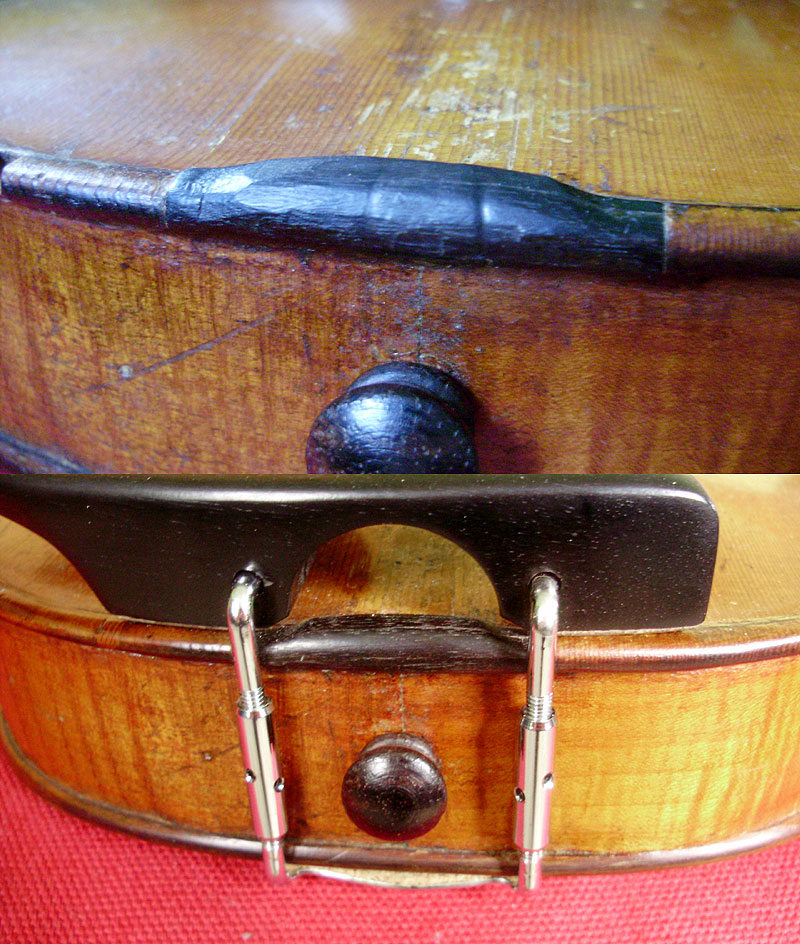
The saddle that was there was probably a replacement, but it was very badly carved. It didn't need to be replaced, but I did clean it up and sand it significantly. I had a new end button in my new parts, but I chose to keep the old one (this is the only part of the old fittings I kept because it was actually ebony).
P9130236

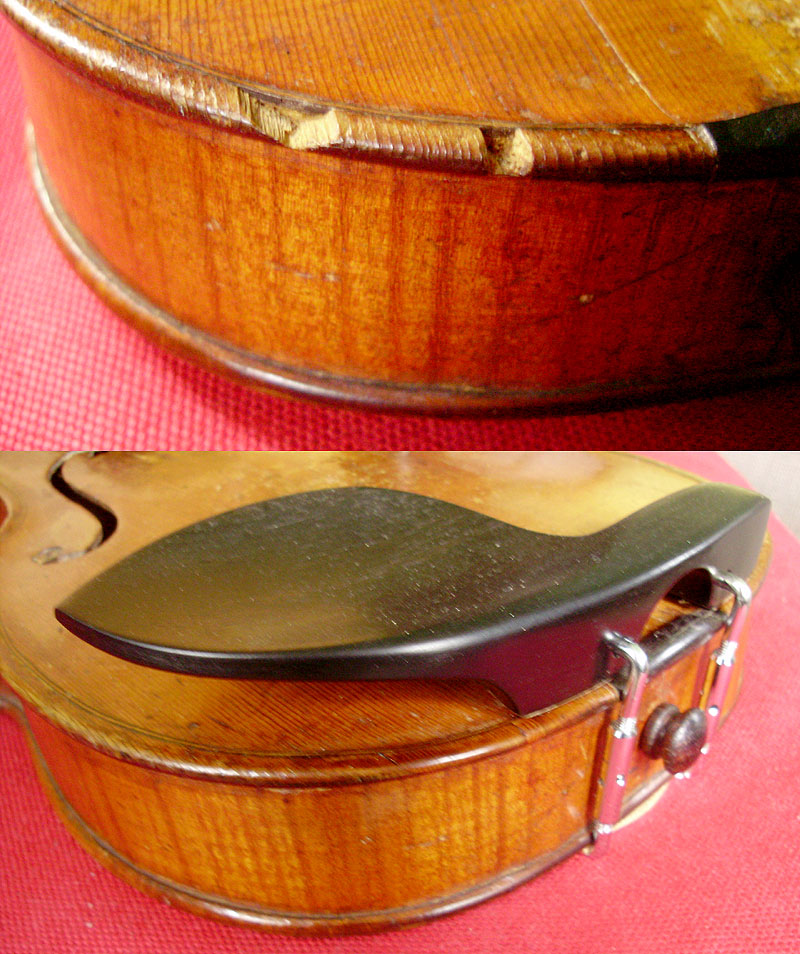
The top had two small chunks broken from the edge that I was able to patch. One is nearly invisible, but the other one shows a little bit.
P9130238

A close up of just the pegbox:

P4240017

P4240014

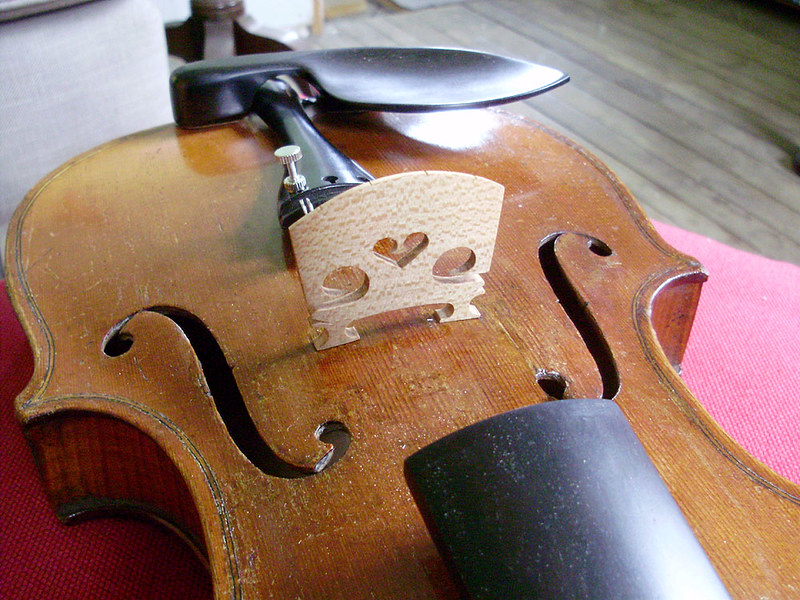
Hand carved and antiqued bridge

P4240016

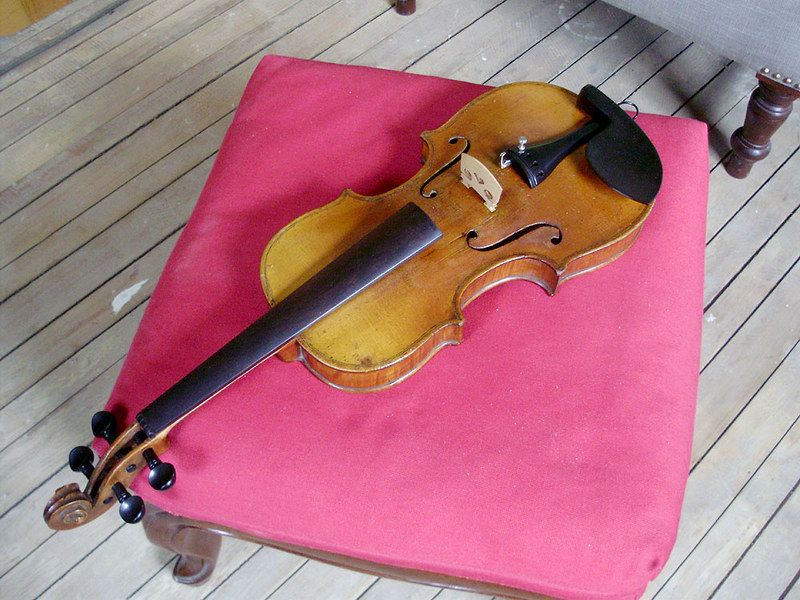
That's it. I may post a photo of it again once it's strung.

Sunday, April 30, 2017

Highly Unusual Vienna Clock - Part 2

As you may have noticed in Part 1, the clock was in somewhat shabby condition, with a large chunk of the crown broken off (and missing) in the top left, as well as some breaks to the bottom bracket and a few veneer issues.


Other missing pieces include all the finials (x5) and two top corner blocks (there were square shadows to each side of the centre crest).

The hardest part to replicate was the upper crown moulding piece, but I was able to get a close-enough shape with a few passes of a cove router bit and some saw cuts. The rest was careful sanding. For the bottom moulding, I chose to replace it with a single rectangular piece, rather than rebuild it in 3 sections like it was.


The veneer on the bottom bracket had some damage to both sides. Sadly my camera has been having a hard time lately (it needs to be replaced), so I did not get many good photos of the repairs. This was the worst side. Most of the back edge was badly chipped, so I replaced a full strip. This was difficult to cut and glue. I had to pre-bend the veneer around two forms to shape it into an "S" before I could glue it. The large chip at the top was just puttied. A veneer repair there would have been difficult and unsightly. It was either putty, or remove another inch-wide strip of veneer down the length of the bracket. This is so low on the clock that the repair isn't that visible.


This was followed by a bit more sanding, some dark stain, and a bit of diluted paint to blend the harsh line. I used orange shellac to varnish the area and blend it into the rest of the original shellac. None of the photos turned out so I may try to take new ones later.

After more touch-ups, small chip repairs, a bit of black paint and shellac, this is the finished case:


The clock still has the original old wavy glass with several imperfections.


The clock originally had wall stabilizers, but they were missing, so I installed a sew set. The finials are still being planned/chosen and they'll be shown in Part 3 once they're installed.


For the two little top blocks, I had to make an educated guess as to what they should look like. As I mentioned earlier, there were two square shadows, and a faint circle outline in the centre of the squares indicating finials. I made the blocks from pine and veneered them in some salvaged antique walnut veneer. The ebonized tops were made to match the bottom bracket detail.


You can sort of see the typical German/Vienna case construction detail of the "lock joint" at each corner of the main box.


All it needs now are the finials.

Wednesday, January 27, 2016

Brewster & Ingrahams Beehive Case Repair

This post details a small chip repair on the case of my early brass-spring Brewster & Ingrahams clock. The case is in near mint original condition, with the original worn finish, however, there was just one chip at the very top of the case that I wanted to fix.


The chip looks fairly large, but in reality, you have to realize that this is an extreme close-up, and the actual size is just over 1.5 inches, and barely half an inch wide. The broken pieces of original veneer had been reglued in the past using hide glue, but they were glued in place a bit crooked.

The first step in the repair was to carefully remove the veneer slivers (dampening the area with water, and working under the veneer with a palette knife). With the veneer removed, the excess glue can be removed along with any stain or finish.


The slivers of veneer were then soaked in hot water to clean off the remaining glue. This caused the shellac to become white and cloudy, but the area will be sanded later, so it's not a big concern. If you're aiming to save the finish, avoid using water, and simply dry-scrape the glue.


At this point, I had to decide if I wanted to glue down the existing pieces of old veneer, or trim everything and install a new patch. Since most of the original wood was there, and everything fit together relatively well, I decided to keep everything original, and just fill-in the missing wood. The veneer pieces were reglued using hot hide glue, and the remaining gaps were filled with putty (just regular mahogany coloured wood filler).

Once everything was completely dry, the entire area was block-sanded to give a perfectly flat surface.


The area was then given some touch-up paint, a few coats of shellac, darkened with a bit of dark toner, and coated with a few additional thin layers of shellac. Once the entire area was fully cured (overnight) the shellac was buffed and polished with #0000 steel wool and tinted wax.

I'm very happy with the repair, and the finish blends in nicely with the rest of the case (without needing to refinish anything).


Saturday, January 23, 2016

Waterbury Beehive Clock Restoration

This is another restoration project that I just finished this week. This clock has been broken, and in pieces and different boxes for nearly a decade. I originally bought this clock at an auction with my aunt and uncle. It was bought on October 10th 2005.


When I bought the clock originally, it wasn't in the best condition. The finish was still original, but crazed and chipped. There were several veneer chips, and the bottom right corner of the clock was badly broken, and held together with a small wire nail.

As is often the case, I thought I had more "before" photos, but unfortunately I only have a handful.


The clock came with 3 beautiful antique keys, unfortunately, none of them fit the clock correctly. The one on the upper right is close, but a bit of a sloppy fit.


Not too long after getting the clock, I stripped off the old finish, only to discover during the process that the bezel was grain-painted. I was able to very gently remove most of the shellac without damaging much of the paint, but about 1/3 of the original grain paint was lightly damaged.


Since stripping the clock, I've put off working on the case repairs. I did not have any rosewood veneer, and I was dreading the curved veneer repairs. I had the parts labeled and in separate bags (movement, dial, gong spiral) and boxes (wooden chunks, gong base, etc).

Earlier this month, and a little bit at the beginning of 2015, I started making lots of veneer and case repairs on several clocks all at once (with this one in the mix). The case needed part of the dial mask and internal support blocks glued, the base and corner piece reglued, and a little over a dozen veneer repairs.


I was able to repair the grain painting to he bezel quite easily, and the entire case was refinished with traditional orange shellac.


The movement was a standard early Waterbury pinned movement. It was in good shape, with the exception of awful hole-closing punch damage.


Very deeply marked hole-closing punch damage. This was an early repair method that is no longer considered acceptable.


This one makes the least sense. This is the motion works wheel, which carries no tension/force from the works, yet it was the most severely and deeply punched hole. This wheel should never require any bushing wear. It technically doesn't even require oiling. The only work that this gear carries out is to advance the hour hand.


There are also small punch marks on the interior on the worn sides of some pivot holes.


This is the only bushing on the movement. It was poorly made/fitted to the back side of the escape wheel.


The springs seem to be the originals, and they are good candidates for replacement. I chose to leave them in the clock for now to see if it would work as-is, but as it turns out the movement is not in top working condition. I will need to open it up again and install a few bushings as well as replace both springs. For the time being, I'm just happy that the clock is all back together.


The completed clock turned out nicely. It's interesting to note that this is considered a rosewood clock, yet the sides and the dial mask are done in mahogany veneer. This is quite common, and normally under a slightly darker finish the difference is very hard to see. Rosewood was more expensive, so it was only used on the front. Some smaller clocks are sometimes entirely rosewood veneered, so it varies.


Also note: the hour hand is the original, while the minute hand is a modern replacement.


One of the nicest features of the clock is the original tablet in mint condition. There is very minimal paint lift to some of the white, as well as several small dots of missing black (not very visible).


Two large veneer patches. About a one inch section of rosewood at the base of the curve (a nearly perfect match), and a vertical patch in the base.


These two patches are a bit more obvious, since the colour did not turn out as well as some of the other areas.


Three patches here, also a bit more visible. The colours looked great before the shellac. Luckily the rosewood has a wide variety of shades.


There are 3 or 4 patches and glue repairs on the curve here, but mostly just one of them shows (with the diagonal cut). In general it's always better to replace an entire "stripe" of veneer, but this spot was repaired with matching antique veneer, so I opted for a smaller repair. Also note the touched-up grain painting on the bezel.


Original grain painting.


The label on this clock is in excellent condition.


The back of the case bears a label to a Kingston, Ontario watchmaker. There was a pencil inscription on the right, but it is now largely gone. As far as I was able to research, this seems to indicate a repair or service date from around the 1890s. The clock dates from the early 1870s.


Full view of the backboard:


There is an inscription that reads" W. S. Duffett, Adolphustown. I was able to trace this down to a William Sealy Duffett (1837 - 1916) who passed away in Adolphustown Ontario. I wasn't able to find much more information on him other than his wife Mary Adalaide Watson, whom he married in Feb 1884. The clock seems unlikely to have been a wedding gift since the date is too late. By around 1874 Waterbury had changed their movement design to have screws on the front rather than pins.


Additionally this clock came with a note (visible at the beginning) that reads:

CAPT. ALLEN'S CLOCK
E. CATHERINE HARKNESS
5th GENERATION

I can find no relation between any captain Allen and the Duffett family, and without any indication of the captain's first name, there are a number of possibilities. There is Captain Christopher C. Allen (1846 - 1915), Captain Adam Allen (1813 - 1885), Capt John Allen (1837- 1913), and Captain Allen Mackenzie Cleghorn (d.1916), which would all conflict with the Duffett information. I imagine that if this clock belonged to a "captain Allen" it would have been sold to him after Mr. Duffett's death in 1916.

My search for E. Catherine Harkness also didn't turn up any useful results.

The clock was sold to me through an auction from collectors with the last name MacDonald, so I'm not sure how this clock might have been in any way "5th generation". The note may have been with the wrong clock?