After many patterns, as well as tweaks and resizing of those patterns, I've decided on some finial patterns for the Vienna. I may still tweak these slightly, but I'm more or less settled on these.
The top finials I'm very happy with. I went through 3 patterns in various sizes, and these seem very nicely balanced. It's important that they not be too wide or too thin.
For the bottom finial pair, they did not look good much wider than this, because the holes for them are SO close to the bottom bracket (about half an inch). The thinness continues the lines of the door columns.
I may tweak the bottom finial more, but the size and general shape work.
All these patterns are simply 4x6 index card, cut on a centre fold, and quickly painted with black acrylic paint.
Part of the restoration of the passing strike components involved replacing the missing bell stand. This is a shaped piece of steel that carries the bell.
Replacements are commercially available, and while they can look okay for certain clocks, the specific design needed for this particular clock means that it needed a custom stand. I prefer to make my own parts whenever possible, because I find that they look a lot nicer than factory made replacements.
Here's a typical mass produced replacement bell stand:
The first step in creating the bell stand is to find a suitable piece of steel, and cutting the blank. I use regular 3/4" x 1/8" steel bar stock from the hardware store. This is fairly mild steel, and it is easy to work with. The blank is cut using a hack saw. This short video shows how I cut the blank.
The rough-cut blank is then further shaped on a bench grinder, or alternatively, with coarse files.
The shape of the bell stand continues to be refined with smoothing files, and then eventually with sandpapers.
To round the stem portion, I begin by coarsely filing the corners, then filing those secondary peaks.
Once the bulk of the shaping has been done with the files, I switch to cloth-backed sanding papers, and I use this technique to round and polish the surface:
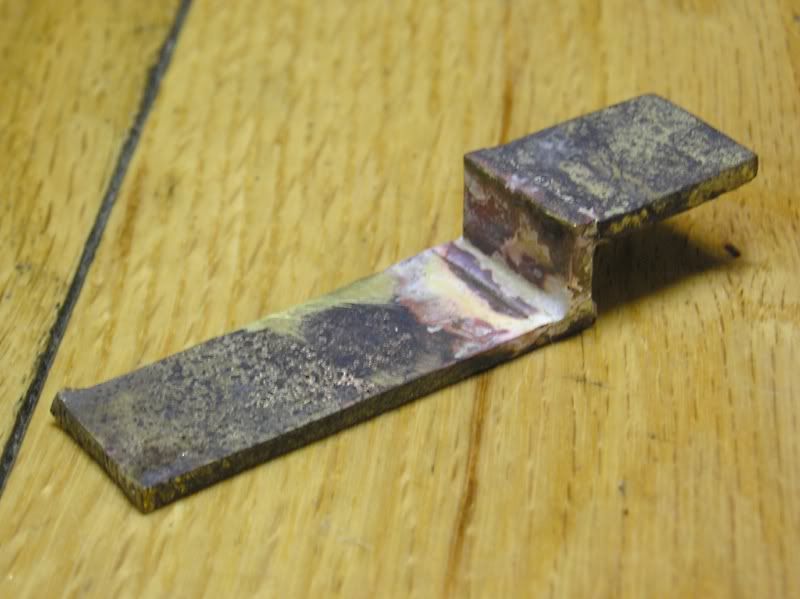
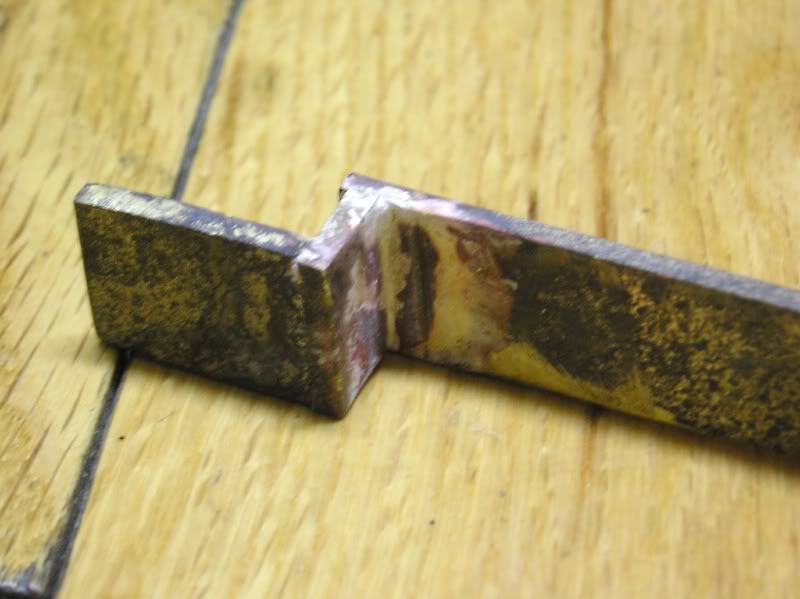
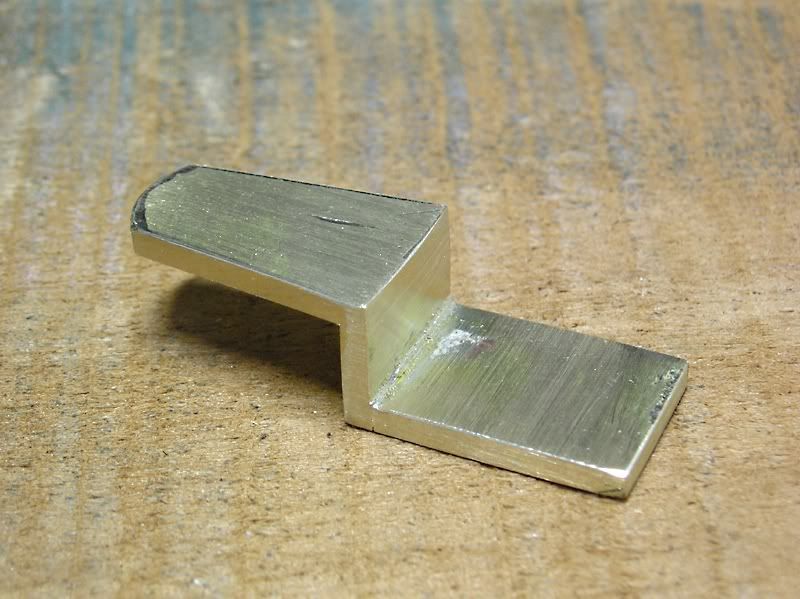
With 90% of the shaping and polishing done, I turn to the fitting of the bell stand to the movement. Normally a bell stand has a pointed teardrop shape that sits flat over the backplate, but this one has the style where the end of the tip turns into a locating hole in the plate. To form this hole, the blank is heated, and bent over an anvil.
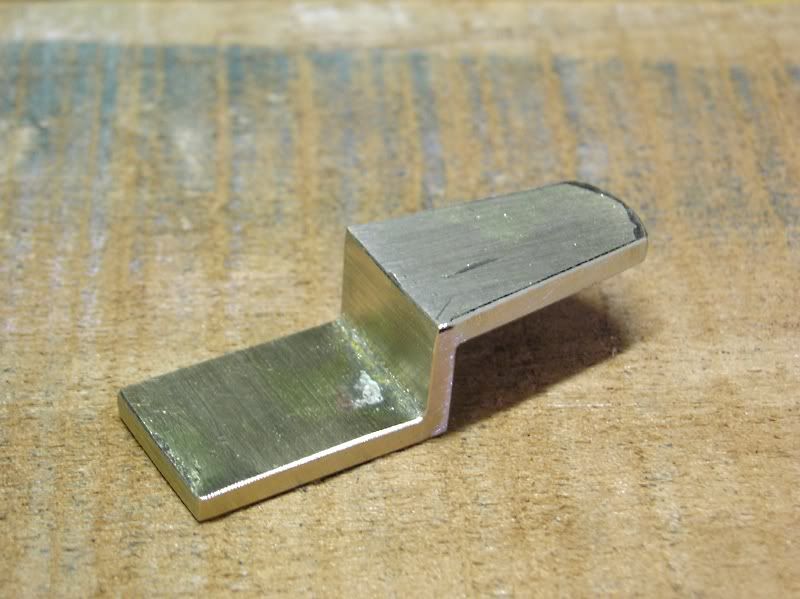
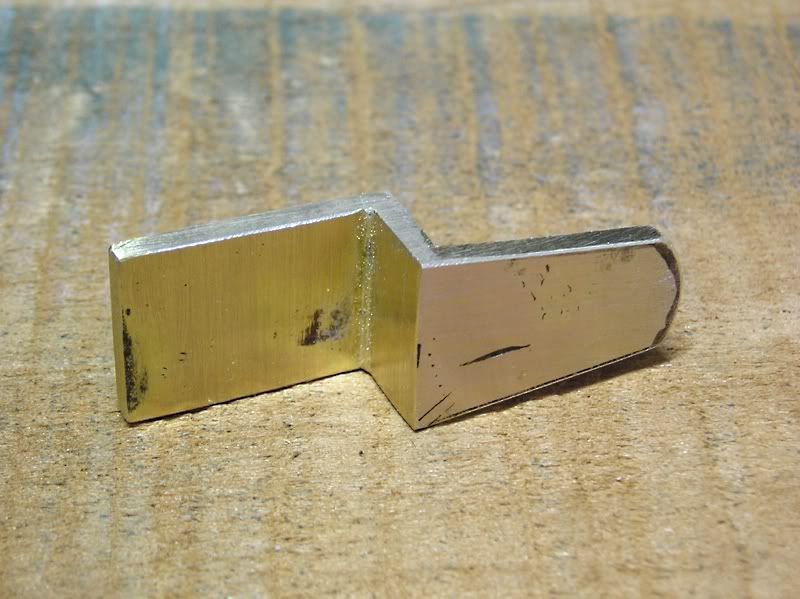
The bulk of the excess metal is carefully filed away until the profile works with the plate holes. The screw hole will be cut last.
For the top of the stand, where the bell must sit, I use just a cross-shaped design that I came up with. This is a simple design, and it has worked well on the last bells stand I made. Not shown is the threading of the top. It is simply filed roughly into a cylinder, and threaded. A square brass nut is then cut, sanded, and tapped to match.
Here you can see the bell stand fitted to the clock plate.
You can also see the bell hammer, the bell stop piece (attached to the pillar), the hammer cock and a bit of the lifting piece. The hammer spring and spring pin had not yet been fitted.
In this post, I cover the repair of the motions works post, the fabrication of the passing strike components, and the fabrication of movement mounting bolts.
A small repair was made to the motion works post, because the tip had broken off at the end where the taper pin slips through. This was done with a simple half-lap joint (hand cut with files), and soldered in place.
The hammer arbour cock was fabricated with brass sheet, and the pieces were hard soldered with silver solder. The process makes for a very scary looking mess, but once everything is cleaned up, filed, and polished, it looks and works beautifully.
The hammer arbour itself is simply a stem with a pivot shaped on each end. The arbour carries a hammer stem, a lifting piece, and a stop pin for the spring.
The lifting piece was cut from 1/16" steel, sanded, polished, and drilled to fit the arbour stem.
The hammer stem was cut from 1/8" thick mild steel bar stock (available at any hardware store). The basic shape was cut out, and the stem portion was rounded and shaped. I will cover my process for rounding the stem in the next post showing the fabrication of the bell stand.
The mounting bolts were a bit fun to fabricate, but ultimately, because I changed the design of the seatboard, they will be useless. I will need to re-make longer ones. The bolts are made from 1/4" mild steel rod, ground/filed slightly thinner at the threaded tips. They are then threaded to fit the pillars (the pillars had to be re-tapped to fit a modern threading), and then square brass tips were fitted and silver soldered to the ends.
Unfortunately, I don't have all my photos in order, so I don't have all the detailed secondary photos of parts like the hammer head, and the hammer stop piece, etc. Stay tuned for the next installment of this ongoing project.
Over the weekend, I went to a flea market with a friend of mine and I made three purchases. One was a small antique mirror, another was a No.1 burner and chimney for one of my oil lamps, and the third was this wonderful antique clock finial.
This is likely a banjo clock finial, but it could also be a longcase clock finial. It's a decent size at around 5 5/8" tall (not counting the stem), 2 1/4" wide in the centre, and 3 1/8" spanning the wings.
I spotted this sitting in a basket, and I immediately grabbed it. The price was right, and I paid for it immediately.
For those who might not be too excited about this finial, or who have never had the misfortune to shop for "just the right hardware", I can tell you that this isn't something you stumble upon too often. Period reproduction brasses tend to cost an arm and a leg, and they're only available by mail order, so shipping must be added to the price. Regular spun brass (cheap) longcase clock finials can't be found for less than 20-30$ each, and the really nice ones are more in the neighbourhood of 150$ each. The same is true for quality locks, knobs, handles, and hinges. This particular finial is not a pattern I've ever encountered before, which makes it even more rare and unusual. The eagle matches many found on banjo clocks, but the urn portion is very different.
The Greek Key trim is an unusual feature, but very much appropriate for the period. I estimate that this finial is from around 1830, possibly a bit earlier. It's hard to tell for certain.
The back of the finial confirmed that this is not a modern reproduction, since it has stress cracks and casting flaws. You can see how the Greek Key banding is made from a separate strip of brass.
The hollow finial is made up of several components which are held together with a central stem. The stem is threaded into the base of the eagle, and fits into the turned base.
I will likely fit this to a reproduction clock case at some point. More than likely a banjo clock.