If you studied the original image of the clock I'll be reproducing, you will notice that it has a few strips of inlay banding incorporated into the design of the front. Inlay banding can be purchased from veneer suppliers, and specialty woodworking and luthier suppliers, but it's really not complicated to make your own, especially if it's composed of a simple geometric pattern.
The tools needed are a table saw, a planer, a small miter box, and various clamps and scrap glue blocks.
When making custom inlay banding, generally there are 2 styles: side grain (best) and end grain. A lot of woodworkers have a tendency to make end grain inlay simply because it seems to make more sense the way that the strips are cut and glued (like making an end grain cutting board) but once you know how side grain inlay is made, you will see that it's almost the same process, and it gives much better results (especially when it comes to staining and finishing the banding).
Here's how I make mine.
The image above shows the basic steps for a fairly complicated-looking, but ultimately quite simple banding. The banding is made up of 6 layers of thin stock (1). Three are dark (cherry, mahogany, walnut, etc), and three are light (holly, maple, satinwood, etc). The wider the strips, the more finished banding "layers" you'll be able to cut from it. I generally aim for around 1.5" wide and around 12" long. The thickness will vary depending on the pattern you want to make, but 1/16" is a common thickness for most banding.
For this alternating checkered pattern, you will need 2 separate "sandwiches": light-dark-light, and dark-light-dark. Once those are glued and dried (2), they can be cut into segments (3). The segments can vary in width, or they can all be the same. Generally the width of segments will range between 1/16" and 1/4". The segments are cut in a small mitre box which is shop made (I use the mitre box with a thin cutting Japanese saw) along with a small stop block for consistent segment widths.
Once all your segments are cut, you can just quickly take the rough sawn edges down with some sand paper. Take the time to do this step, because you want to avoid as many "glue gaps" as possible.
Gluing the segments together can be a bit tricky, but one easy method is to stick them down onto some double sided masking tape attached to the bottom gluing block. Each section is laid out beforehand so that everything can be glued fairly quickly. Try not to make your inlay strip overly long, since the glue starts to firm-up after 5 minutes or so. I aim for about 12 inches max (as stated earlier). If you only need a small section of banding for a repair, you can make it only a few inches long.
I glue each section in order, end-to-end, pressing them firmly together, and down on the tape, and then I glue the top "facing veneer" (4) down over the entire row of segments. To clarify: all the centre segments, plus top facing veneer is glued in one operation, so work quickly. Once that has been clamped and has dried for about 20-30 minutes, I'll take off the clamps, remove the bottom glue block and the tape, and I'll glue the facing veneer on the opposite side. The finished banding will then be left to dry for several hours. Once it's thoroughly dry, the banding is removed from the clamps, the excess overlapping facing veneer is trimmed off, and each edge is cleaned up either on the joiner, with a hand plane, a belt sander, or on the table saw. The finished banding can be sliced to whatever thickness you need, and used on all sorts of projects.
Note: The sample piece of inlay (5) has a doubled facing veneer (cherry, then maple). These were both glued together in one shot, following the same procedure I describe above.
There are very few limits as to how far you can tweak this technique. You can mix 1/16" thick "main strips" with layers of thin veneers, you can cut the designs into triangles, and the "Barber Pole" inlay seen in the first image at the top is nothing more than a large stack of 5 or 6 layers that is then cut on the diagonal and then glued side by side between facing veneers. You can also use much more than just 2 colours in your inlay. Often traditional inlay banding will mainly stick to 2 or 3 colours, but there are a ton of variations using very complicated designs. If you think you might be interested in making more patterns, or are looking for other ideas, there are a lot of tutorials on YouTube.
Another small note is that when you are using facing veneers, you can cheat quite a bit with the wood species. I used cherry veneer, with pale mahogany as the main "dark" wood. Since the facing veneer is so thin, it's impossible to tell that it's not the same wood.
Saturday, July 25, 2015
Thursday, July 23, 2015
Massachusetts Shelf Clock Project Part 1 - Initial Planning
I have a wonderful quality movement that I built from a kit a few years ago, and I've been meaning to build a dwarf clock or a Massachusetts shelf clock (early Willard style case) case for it. For a few years (while working on other projects projects) I've been adding to my archives of clock reference photos in preparation for this clock.
After a lot of sifting through all the various photos, I decided that this was the case I liked the most:
The clock is an early 8 day timepiece by Aaron Willard, and the case measures approximately 39" tall (incl the finial) x 13.5" wide. Based on some conversations with a good friend, I felt that this was bit on the large size, so I scaled the clock down slightly to 36".
The clock was planned out and measured using Photoshop, and a grid to accurately measure all the parts of the case. This shows the fretwork.
Full size sketch:
All the patterns for the clock were traced and cut from thin cardboard.
After having traced out the case, it became very apparent that the pendulum length from my movement was not going to work well with this case design. As-is, the pendulum lands in the centre of the French feet. I would need to add about 4" to the height, and I didn't want to mess too much with the original proportions.
Because of this, I decided to trace out "Plan B" which is a clock by Reuben Tower. This clock has a MUCH longer trunk, lovely fretwork to the top, and beautiful decorative veneer work on the base. While I still find the Aaron Willard clock much more classy and stylish, I also quite like this case, and it's one of the designs I kept revisiting.
The Reuben Tower clock is 48.25" tall (incl the finial) and 12.125" wide. This is the only photo I was able to find of this particular clock.
While I like the clock as-is, I decided to shrink the trunk SLIGHTLY, and add a curved base to the bottom of the kidney dial (99% have a curved base and I don't like this flat version).
The same process was used to measure and trace the clock.
The finished clock will be quite large.
Dial is 7" diameter.
One of the advantages of this particular case design is that it features a door in the trunk. Several of the other designs (such as the Aaron Willard) have a fixed bottom panel, which simply creates an inaccessible "well" for the base of the clock. The top hood on all these clocks slides forward to access the movements.
Labels:
1820s,
1830s,
Drawing,
Massachusetts,
Planning,
Project,
Reproduction,
Research,
Shelf
Saturday, July 11, 2015
Friday, July 10, 2015
Mirror Clock Project Part 9 - The Finished Clock
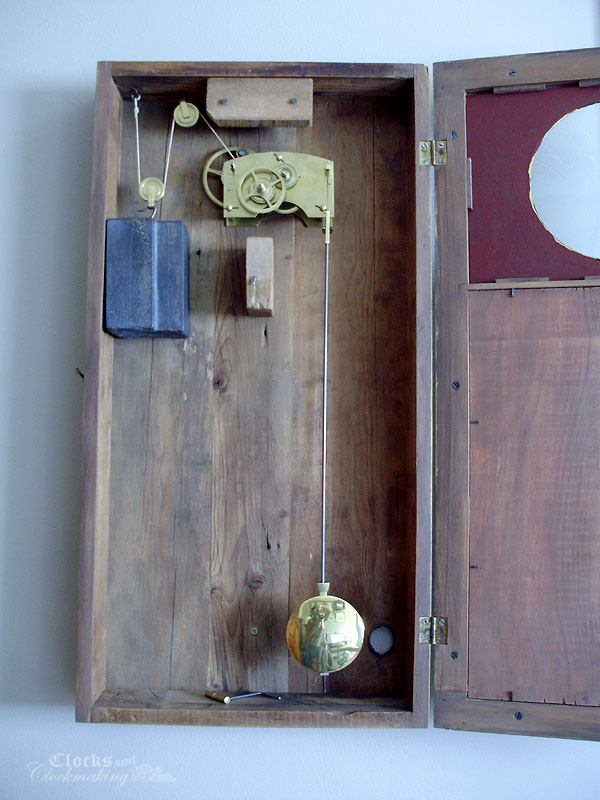
With the antique mirror finally installed, and all the final touch ups completed, the clock is now fixed to the wall properly (no more wooden block hanging on the wall), and it's ready to be used and enjoyed. A lot of work went into this reproduction, and I had a lot of fun working on it. It came out beautifully, and pretty soon I'll be working on another clock to house my custom made Lenderman movement.
I plan to make a short video of the mirror clock soon, and I will post it here once it's ready.
Mirror Clock Project Part 8 - The Mirror
Nothing beats the real thing, and rather than try to recreate an antique mirror, I was able to find one through an antiques restorer friend. The mirror he gave me had a fairly severe scratch across it on one side, but the size I needed would avoid this scratch completely. One other problem with the mirror was that it had several blobs of hot glue on the back.
Removing the glue was a trial and error method, and the first two methods failed. The first scratched the silvering, while the second pulled all of it off:
I eventually was able to remove all the glue using a mix of heat and a mild scrubbing in lacquer thinner. Once the glue was gone, I was able to cut the mirror to size and fit it onto the door. I used 12 small wood strips with a tiny nail in each.
The "inside back" wood panel was attached with small square nails. Some of these panels are fixed with the beveled edge facing out, while others have it facing in. This side of the wood was nicer, and my bevels were rather rough, so I chose to have the bevels inside. The clearances on this were tight, and this is probably why most of these doors are 3/4" thick rather than 5/8".
A few other small details that I did not show are the two rear bolts that hold the movement in place. Most are held in place with a single centre bolt, and a few small square nails on the interior to keep the movement from shifting, but I wanted a very secure fit since the weight is so heavy.
I don't remember if I had shown the pivot hole divots in the backboard, but I also adjusted the colour of the wooden dial blocks.
Aside from making a custom label, the clock is now finished and running nicely. Final photos will be shown in the next post.
Friday, July 3, 2015
Rossignol à Caylux Comtoise - Before Photos
I had no real intentions of purchasing a third comtoise, but this one happened to be within Ontario (my home province) and was very cheap. This was the least expensive comtoise out of the three. I went from fairly expensive, to well-priced, to a real bargain!
The clock is not without its flaws, however. As the photos will show, the clock has had an ugly metal wall-mounting bracket added to the top, and it has a missing side door. It also came without weights, a pendulum, or a key. The weight lines are also no good. Still, this is a great piece. The quality and craftsmanship on these clocks is exceptional, and I don't mind owning several of them.
The clock has a similar "Sun King" theme as my 1840s comtoise, but this one is a bit later, and the theme is more geared towards "The Harvest" from the prominent sheaves of wheat and farming tools shown surrounding the sun. More details on the dial later.
This particular clock has a number of slightly odd features, such as the round bell post (most have a square section). The bell is also brass, and it is likely an older replacement (but it sounds beautiful).
The movement is fairly early, and uses a crown wheel escapement, with a single spun brass (these are lead-filled) detent weight. It also uses the earlier style of thinner main wheels.
Here you can see the metal bracket added to the back (which will be removed), and the incorrectly installed hammer (it should be to the back, and under the bell).
Note that the bracket is not even centered. I'm not sure if the back panel and door are original to the clock or not.
Very finely detailed crown wheel support stem.
It's not too visible in this photo, but the front cap/cover of the silk thread suspension "hat" is missing.
The following photos show areas of the dial that will have dents repaired.
The scythe is very crumpled.
This is the worst section of the dial front. I'm not too sure what kind of tool this is, but the handle is very damaged.
The figure on this model is very androgynous compared to the other pattern.
The bottom corners are very unusual. I'm not sure what sort of huts these are meant to represent. They seem to sit on small platforms with 2 feet. It seems like a very unusual choice to mix with the rest of the design. If anyone has any information or thoughts on this, please feel free to comment about it and let me know.
I have started restoring this clock, and I've made several interesting discoveries. More soon.
The clock is not without its flaws, however. As the photos will show, the clock has had an ugly metal wall-mounting bracket added to the top, and it has a missing side door. It also came without weights, a pendulum, or a key. The weight lines are also no good. Still, this is a great piece. The quality and craftsmanship on these clocks is exceptional, and I don't mind owning several of them.
The clock has a similar "Sun King" theme as my 1840s comtoise, but this one is a bit later, and the theme is more geared towards "The Harvest" from the prominent sheaves of wheat and farming tools shown surrounding the sun. More details on the dial later.
This particular clock has a number of slightly odd features, such as the round bell post (most have a square section). The bell is also brass, and it is likely an older replacement (but it sounds beautiful).
The movement is fairly early, and uses a crown wheel escapement, with a single spun brass (these are lead-filled) detent weight. It also uses the earlier style of thinner main wheels.
Here you can see the metal bracket added to the back (which will be removed), and the incorrectly installed hammer (it should be to the back, and under the bell).
Note that the bracket is not even centered. I'm not sure if the back panel and door are original to the clock or not.
Very finely detailed crown wheel support stem.
It's not too visible in this photo, but the front cap/cover of the silk thread suspension "hat" is missing.
The following photos show areas of the dial that will have dents repaired.
The scythe is very crumpled.
This is the worst section of the dial front. I'm not too sure what kind of tool this is, but the handle is very damaged.
The figure on this model is very androgynous compared to the other pattern.
The bottom corners are very unusual. I'm not sure what sort of huts these are meant to represent. They seem to sit on small platforms with 2 feet. It seems like a very unusual choice to mix with the rest of the design. If anyone has any information or thoughts on this, please feel free to comment about it and let me know.
I have started restoring this clock, and I've made several interesting discoveries. More soon.
Labels:
1840s,
1850s,
1860s,
Before,
Comtoise,
Dent Removal,
French,
Hardware,
Restoration,
Rust
Subscribe to:
Posts (Atom)